Moving Data With Globus
Video - An Example in Using Globus
What is Globus?
From https://www.globus.org/what-we-do:
Globus is a non-profit service for secure, reliable research data management.With Globus, subscribers can move, share, & discover data via a singleinterface – whether your files live on a supercomputer, lab cluster, tapearchive, public cloud or your laptop, you can manage this data from anywhere,using your existing identities, via just a web browser.Developers can also use Globus to build applications and gatewaysleveraging our advanced identity management, single sign-on, search,authorization, and automation capabilities.
RIS and Wash U IT have a partnership with Globus to provide an integrated solution for data movement.
storageN
The use of
storageNwithin these documents indicates that any storage platform can be used.- Current available storage platforms:
storage1
storage2
Quick Start
1. Log in with an existing identity
Visit https://app.globus.org and click “Login” at the top of the page. On the Globus login page, choose an organization you’re already registered with, such as your school or your employer.
Select “Washington University in St. Louis” in the Organization widget and click “Continue”:
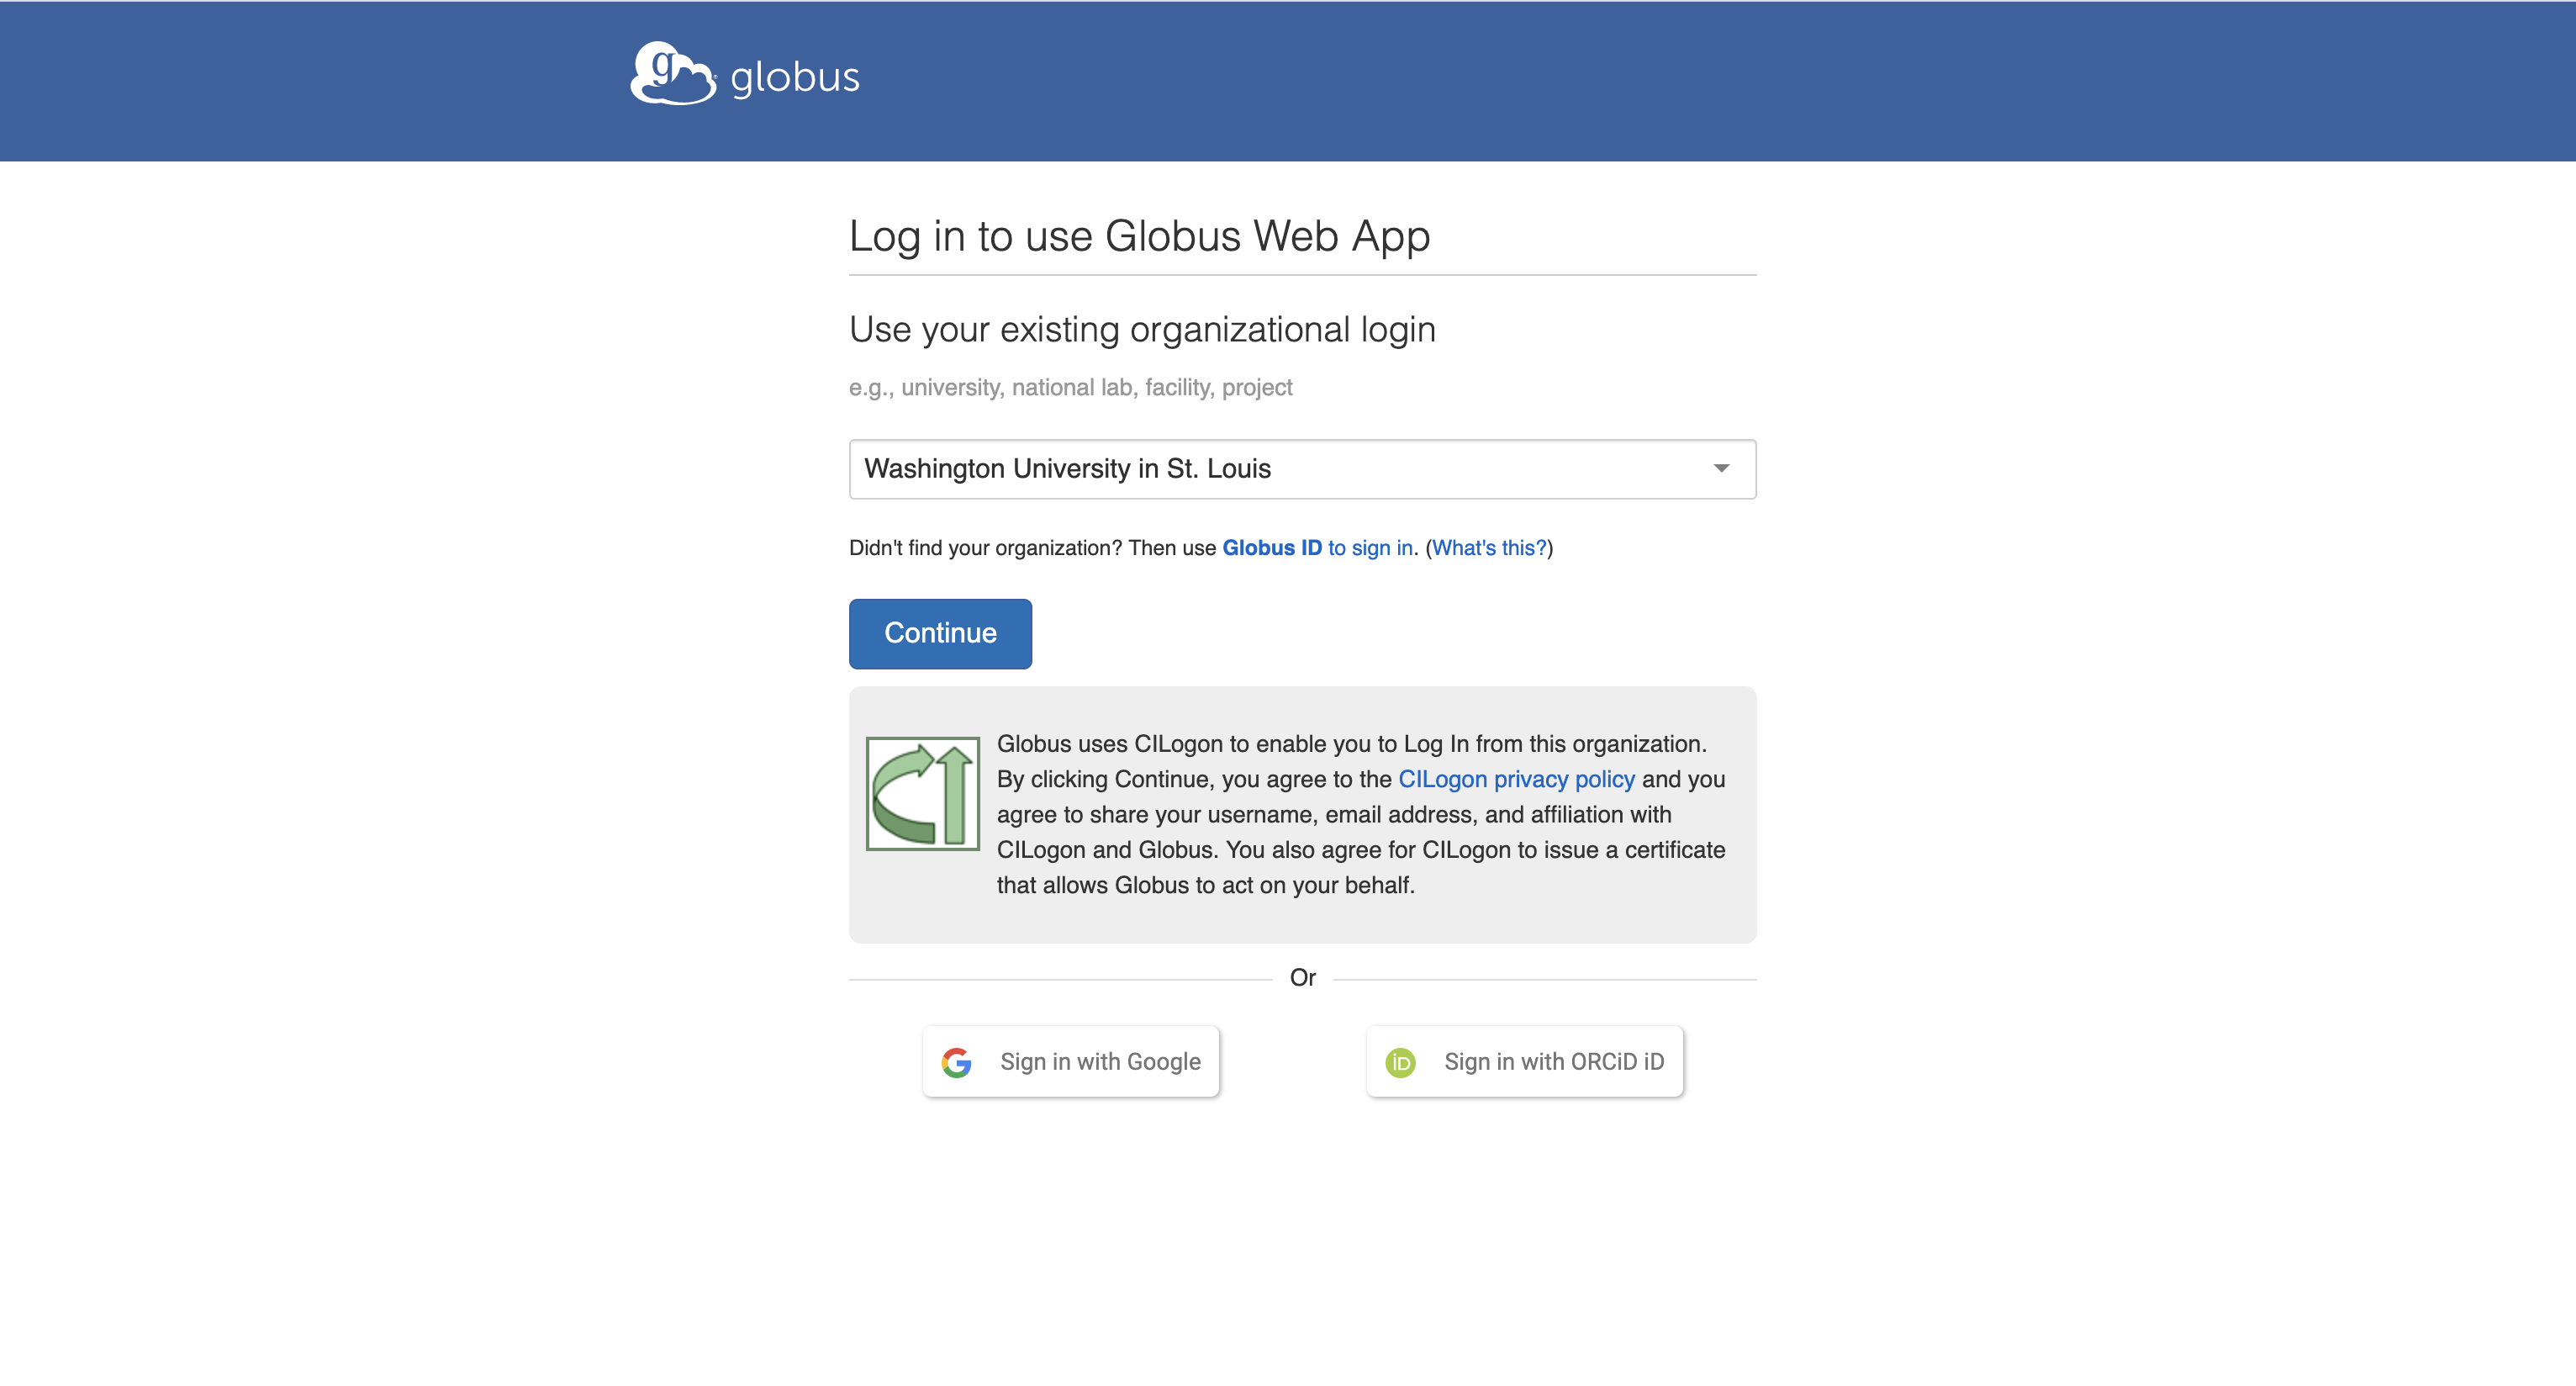
You’ll be redirected to your organization’s login page. Use your credentials for that organization to login.

Once you’ve logged in with your organization, Globus will ask if you’d like to link to an existing account. If this is your first time logging in to Globus, click “Continue.” If you’ve already used another account with Globus, you can choose “Link to an existing account.”
You may be prompted to provide additional information such as your organization and whether or not Globus will be used for commercial purposes. Complete the form and click “Continue.”
Finally, you need to give Globus permission to use your identity to access information and perform actions (like file transfers) on your behalf.
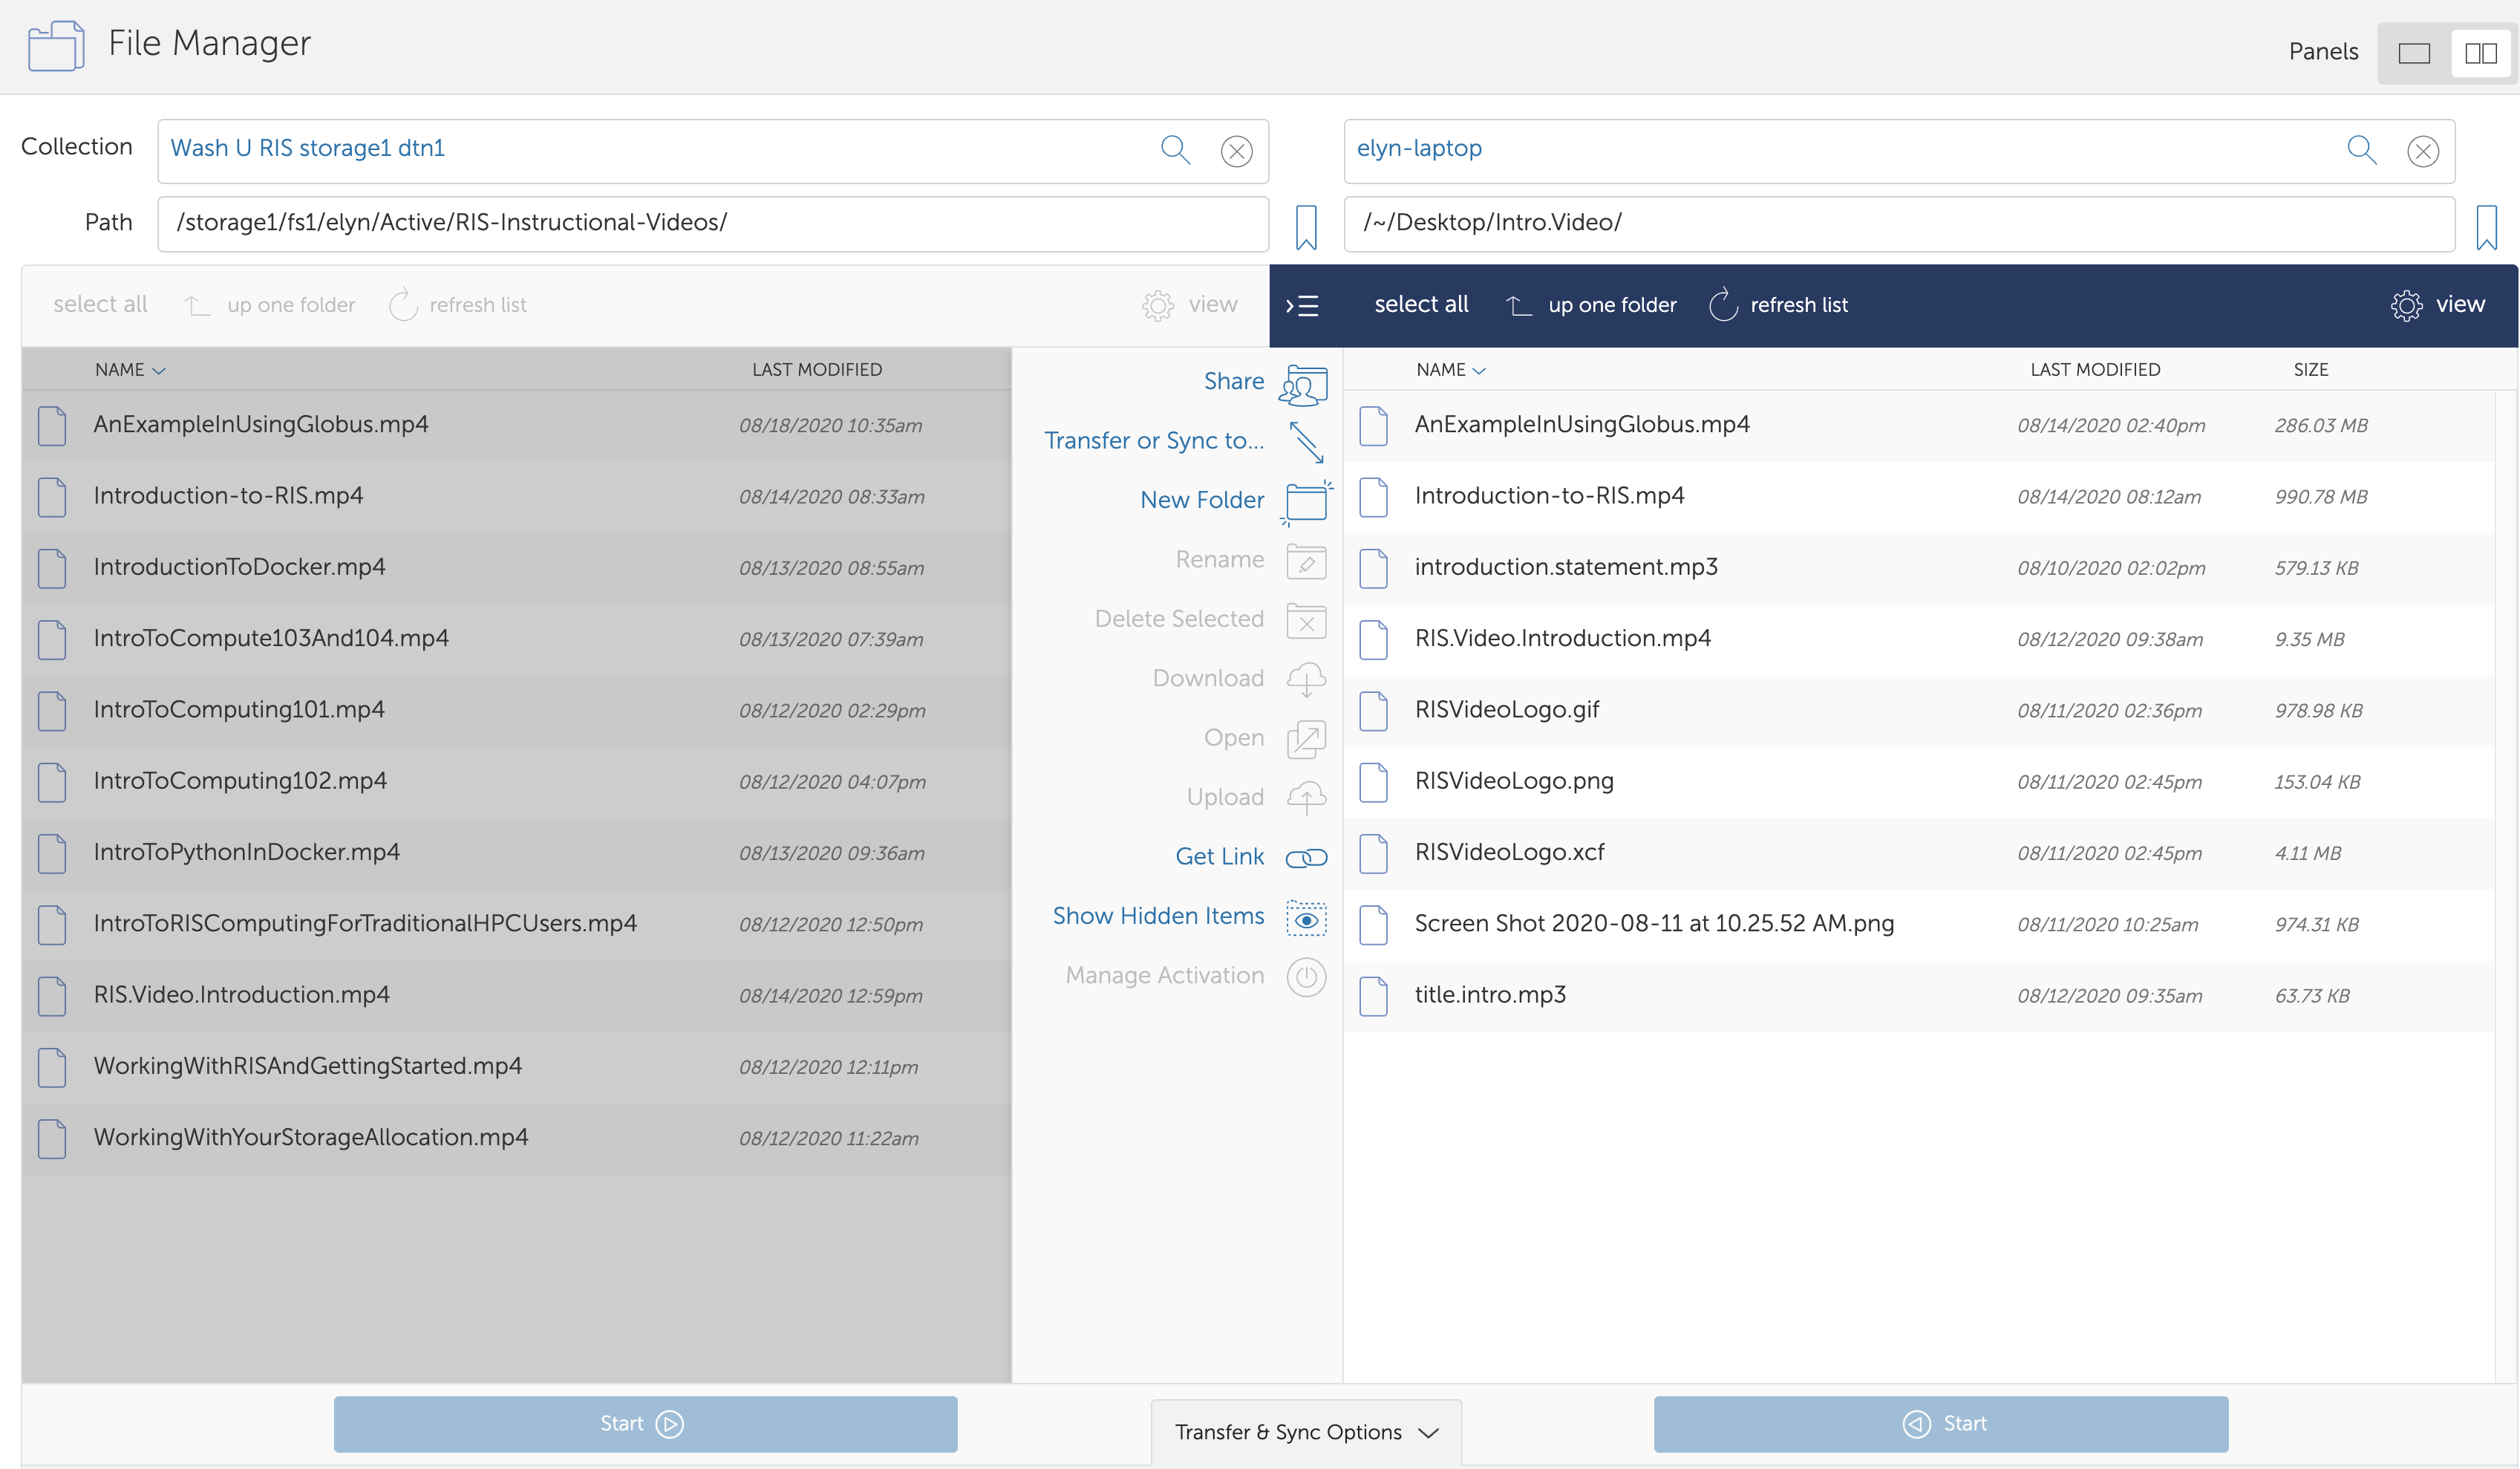
2. The File Manager
After you’ve signed up and logged in to Globus, you’ll begin at the File Manager.
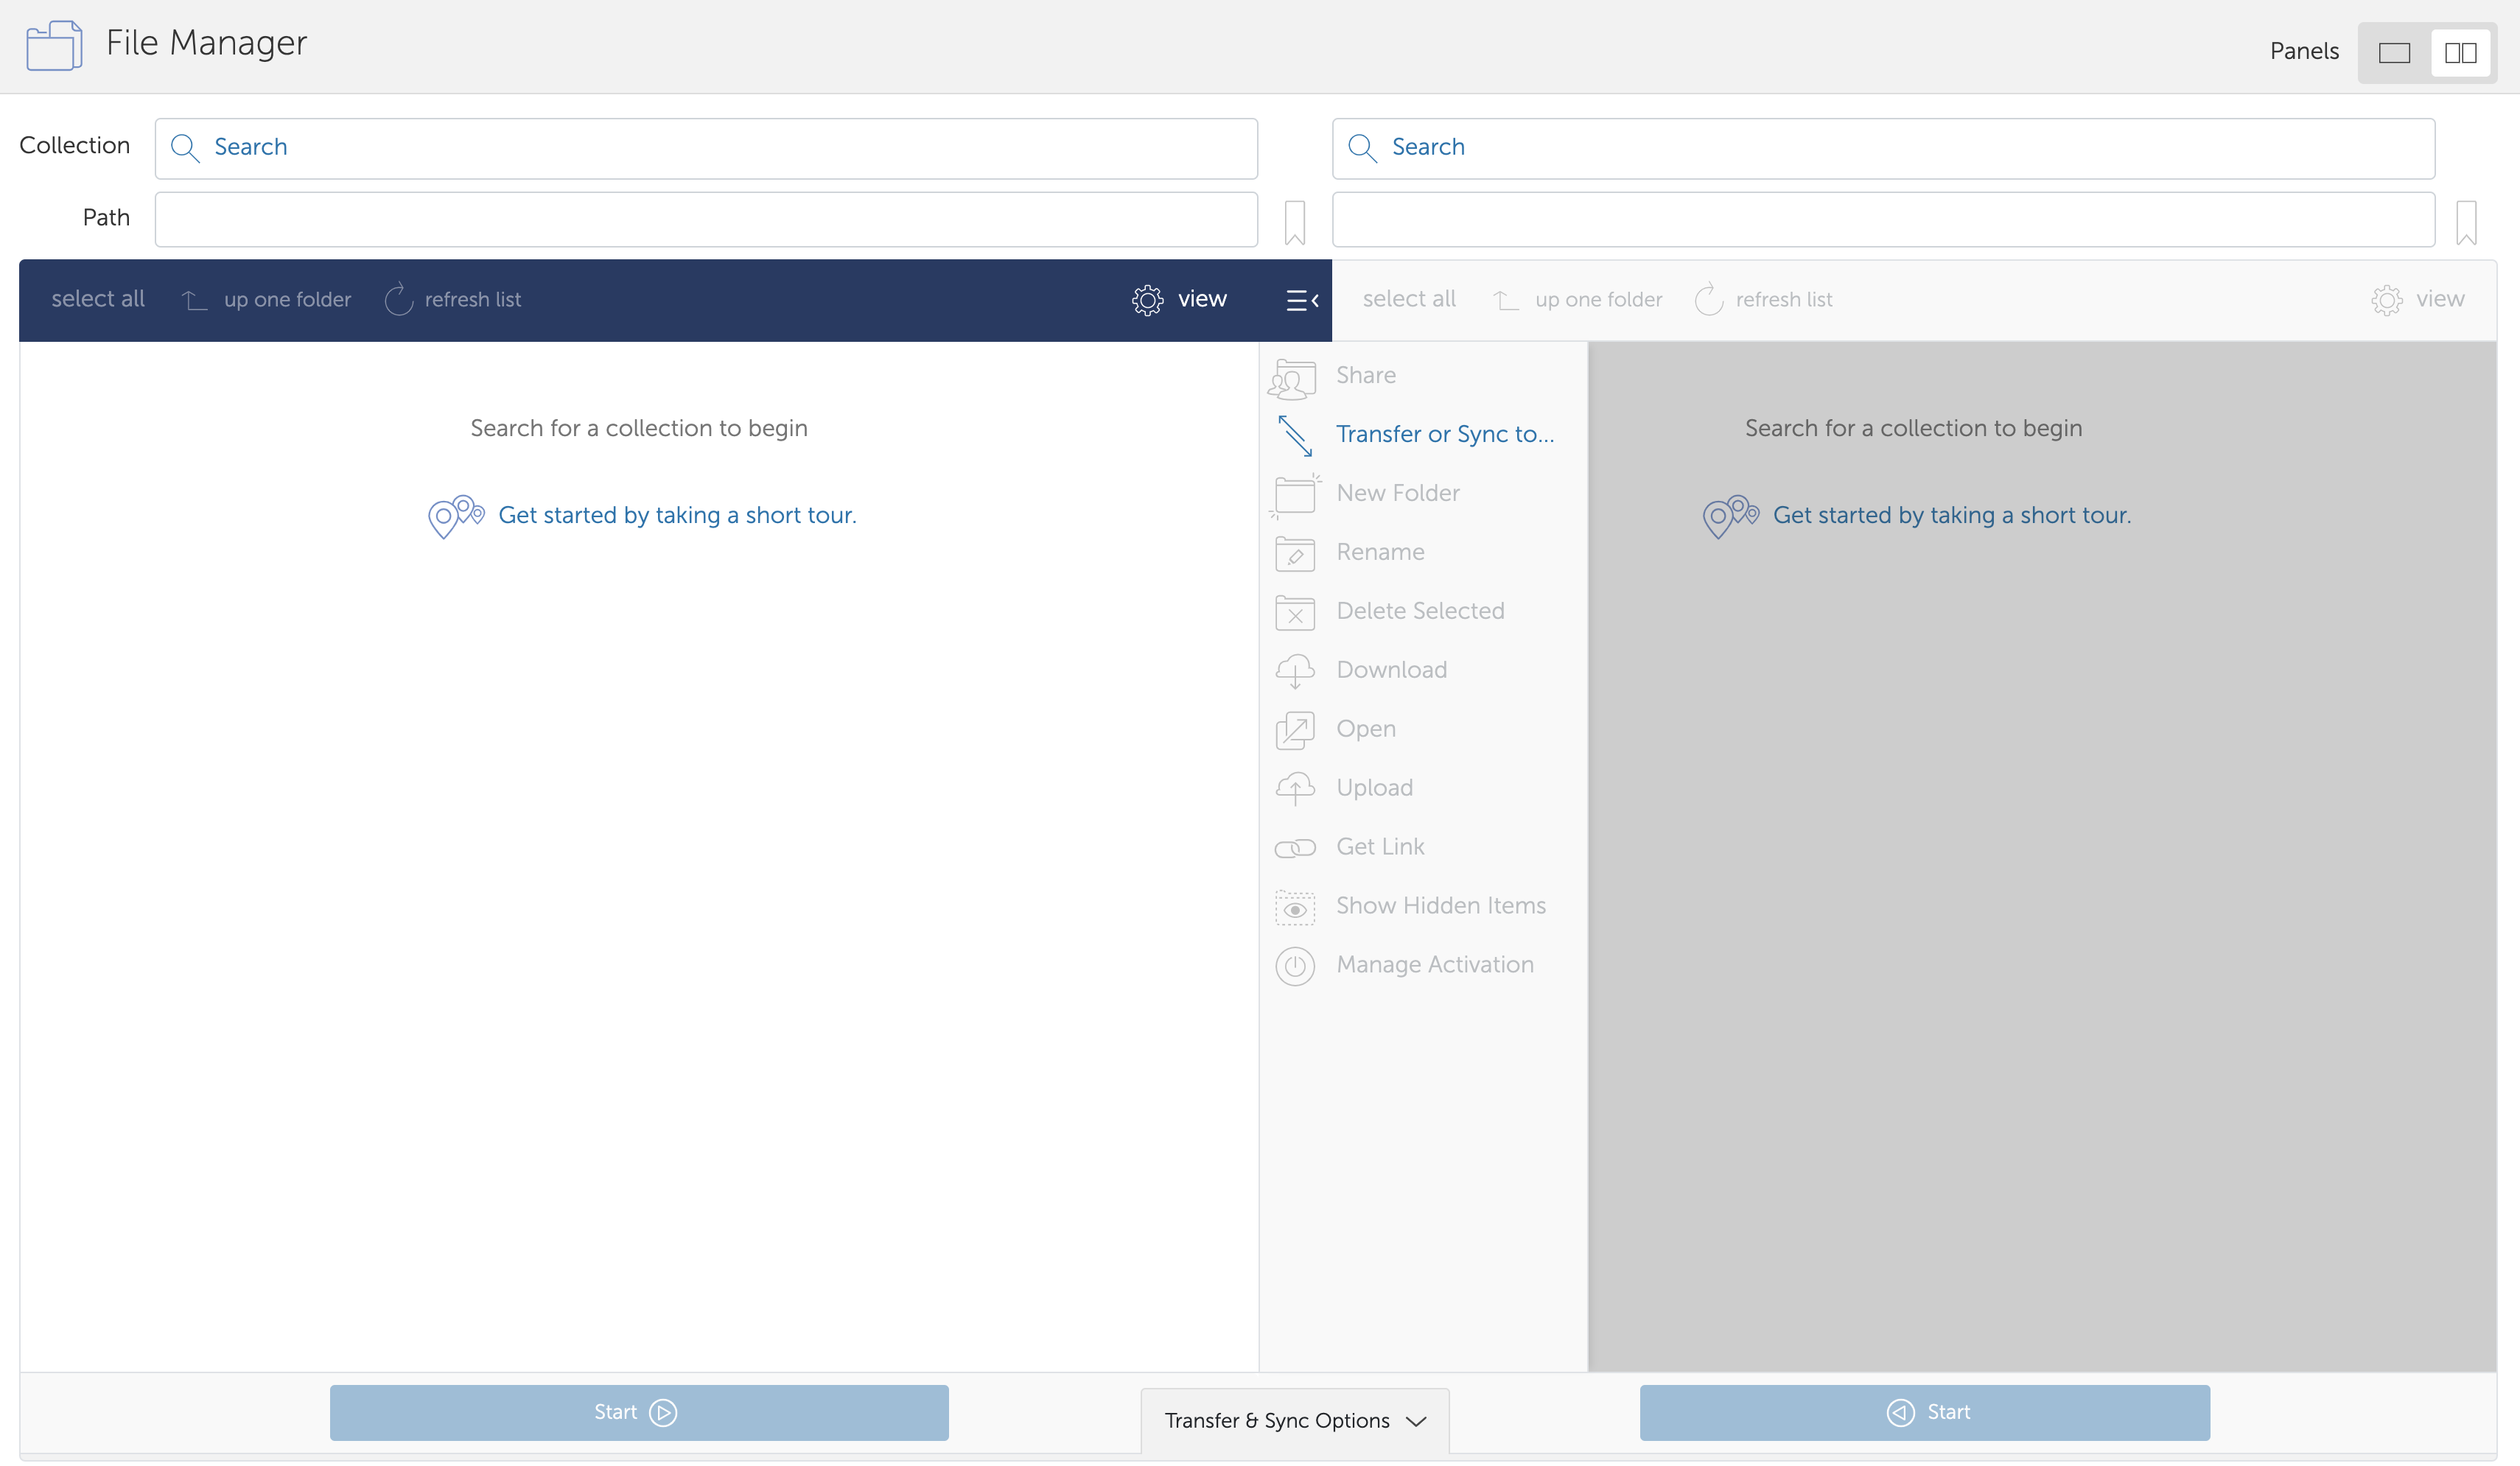
The first time you use the File Manager, all fields will be blank.
Note
A collection is a named location containing data you can access with Globus. Collections can be hosted on many different kinds of systems, including campus storage, HPC clusters, laptops, Amazon S3 buckets, Google Drive, and scientific instruments. When you use Globus, you don’t need to know a physical location or details about storage. You only need a collection name. A collection allows authorized Globus users to browse and transfer files. Collections can also be used for sharing data with others and for enabling discovery by other Globus users. Globus Connect is used to host collections.
3. Access a collection
Click in the Collection field at the top of the File Manager page and type “globus tutorial end”. Globus will list collections with matching names.
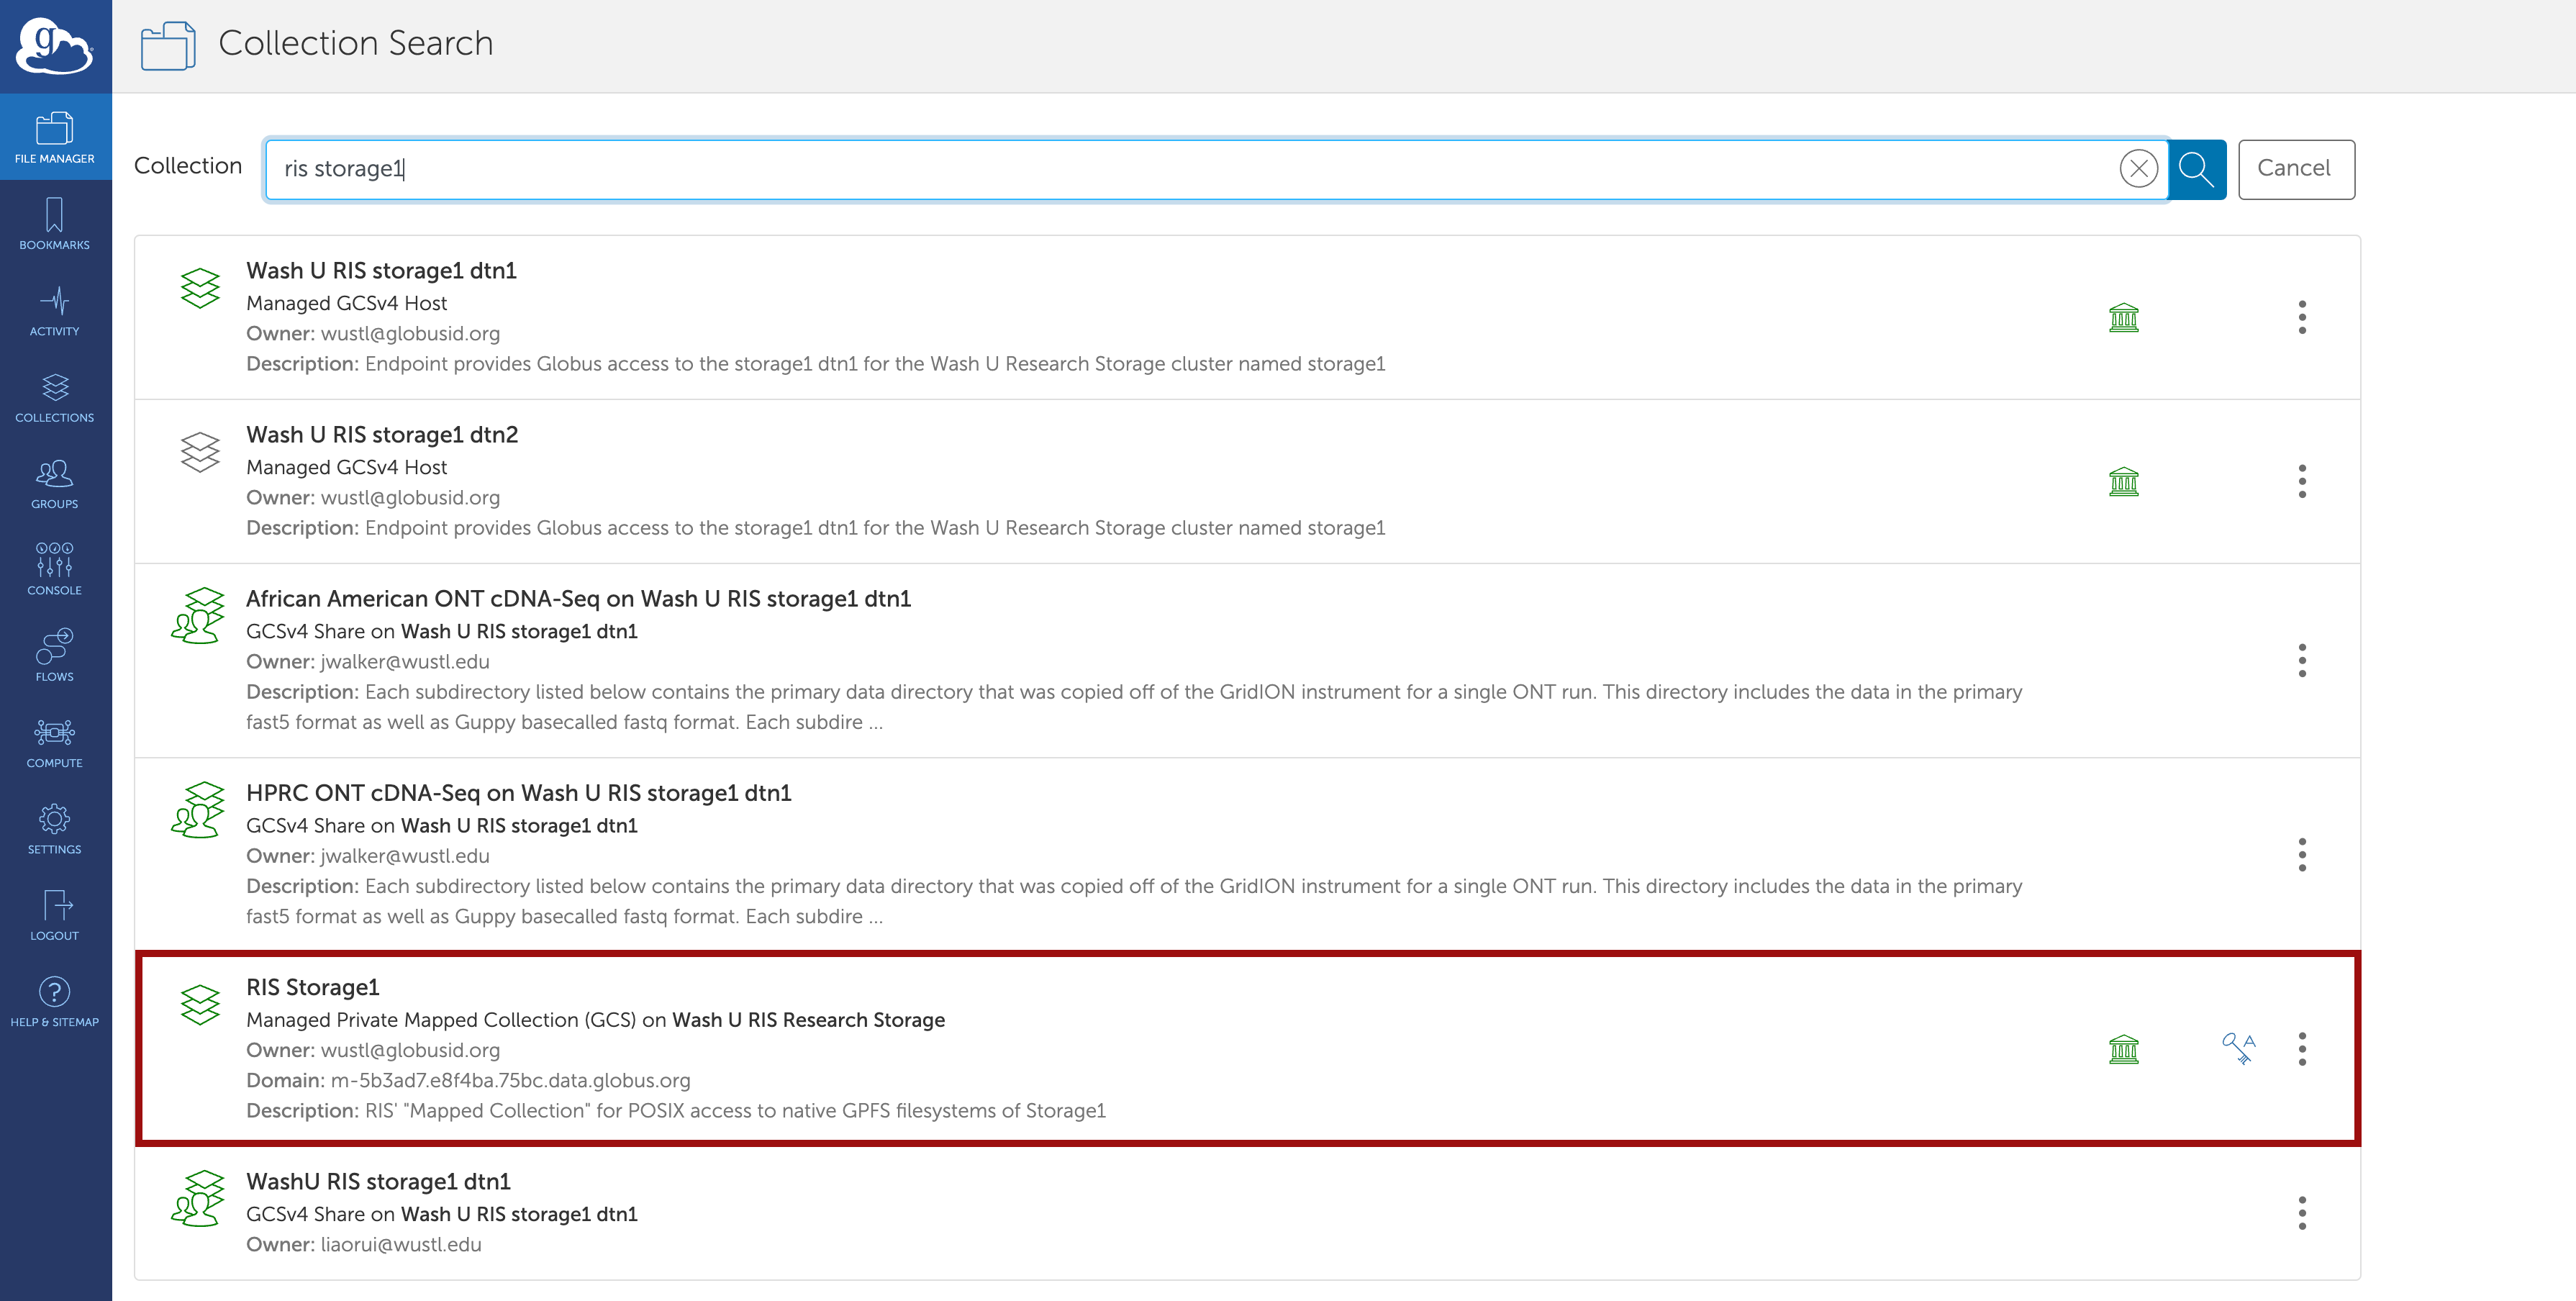
WashU RIS now has a single collection within Globus. This is named
RIS Storage1and is a High Assurance Collection.Once you’ve selected one of the storage endpoints, you will need to navigate to the allocation by entering /storageN/fs1/STORAGE_ALLOCATION/Active/ into the path field and pressing enter on the keyboard, where STORAGE_ALLOCATION is the name of your or your group’s storage allocation.
High Assurance Collection (HIPAA Compliant)
The
RIS Storage1now has a High Assurance Gateway that provides HIPAA compliance in terms of transferring data via Globus.- This has the same
RIS Storage1name, however, the Domain and Description state that it is the High Assurance gateway. Domain:
m-98e5ae.e8f4ba.75bc.data.globus.orgDescription: RIS “High Assurance” “Mapped Collection” for POSIX access to native GPFS filesystems for Storage1.
- This has the same
There is also a little handbag symbol that indicates the collection is High Assurance.

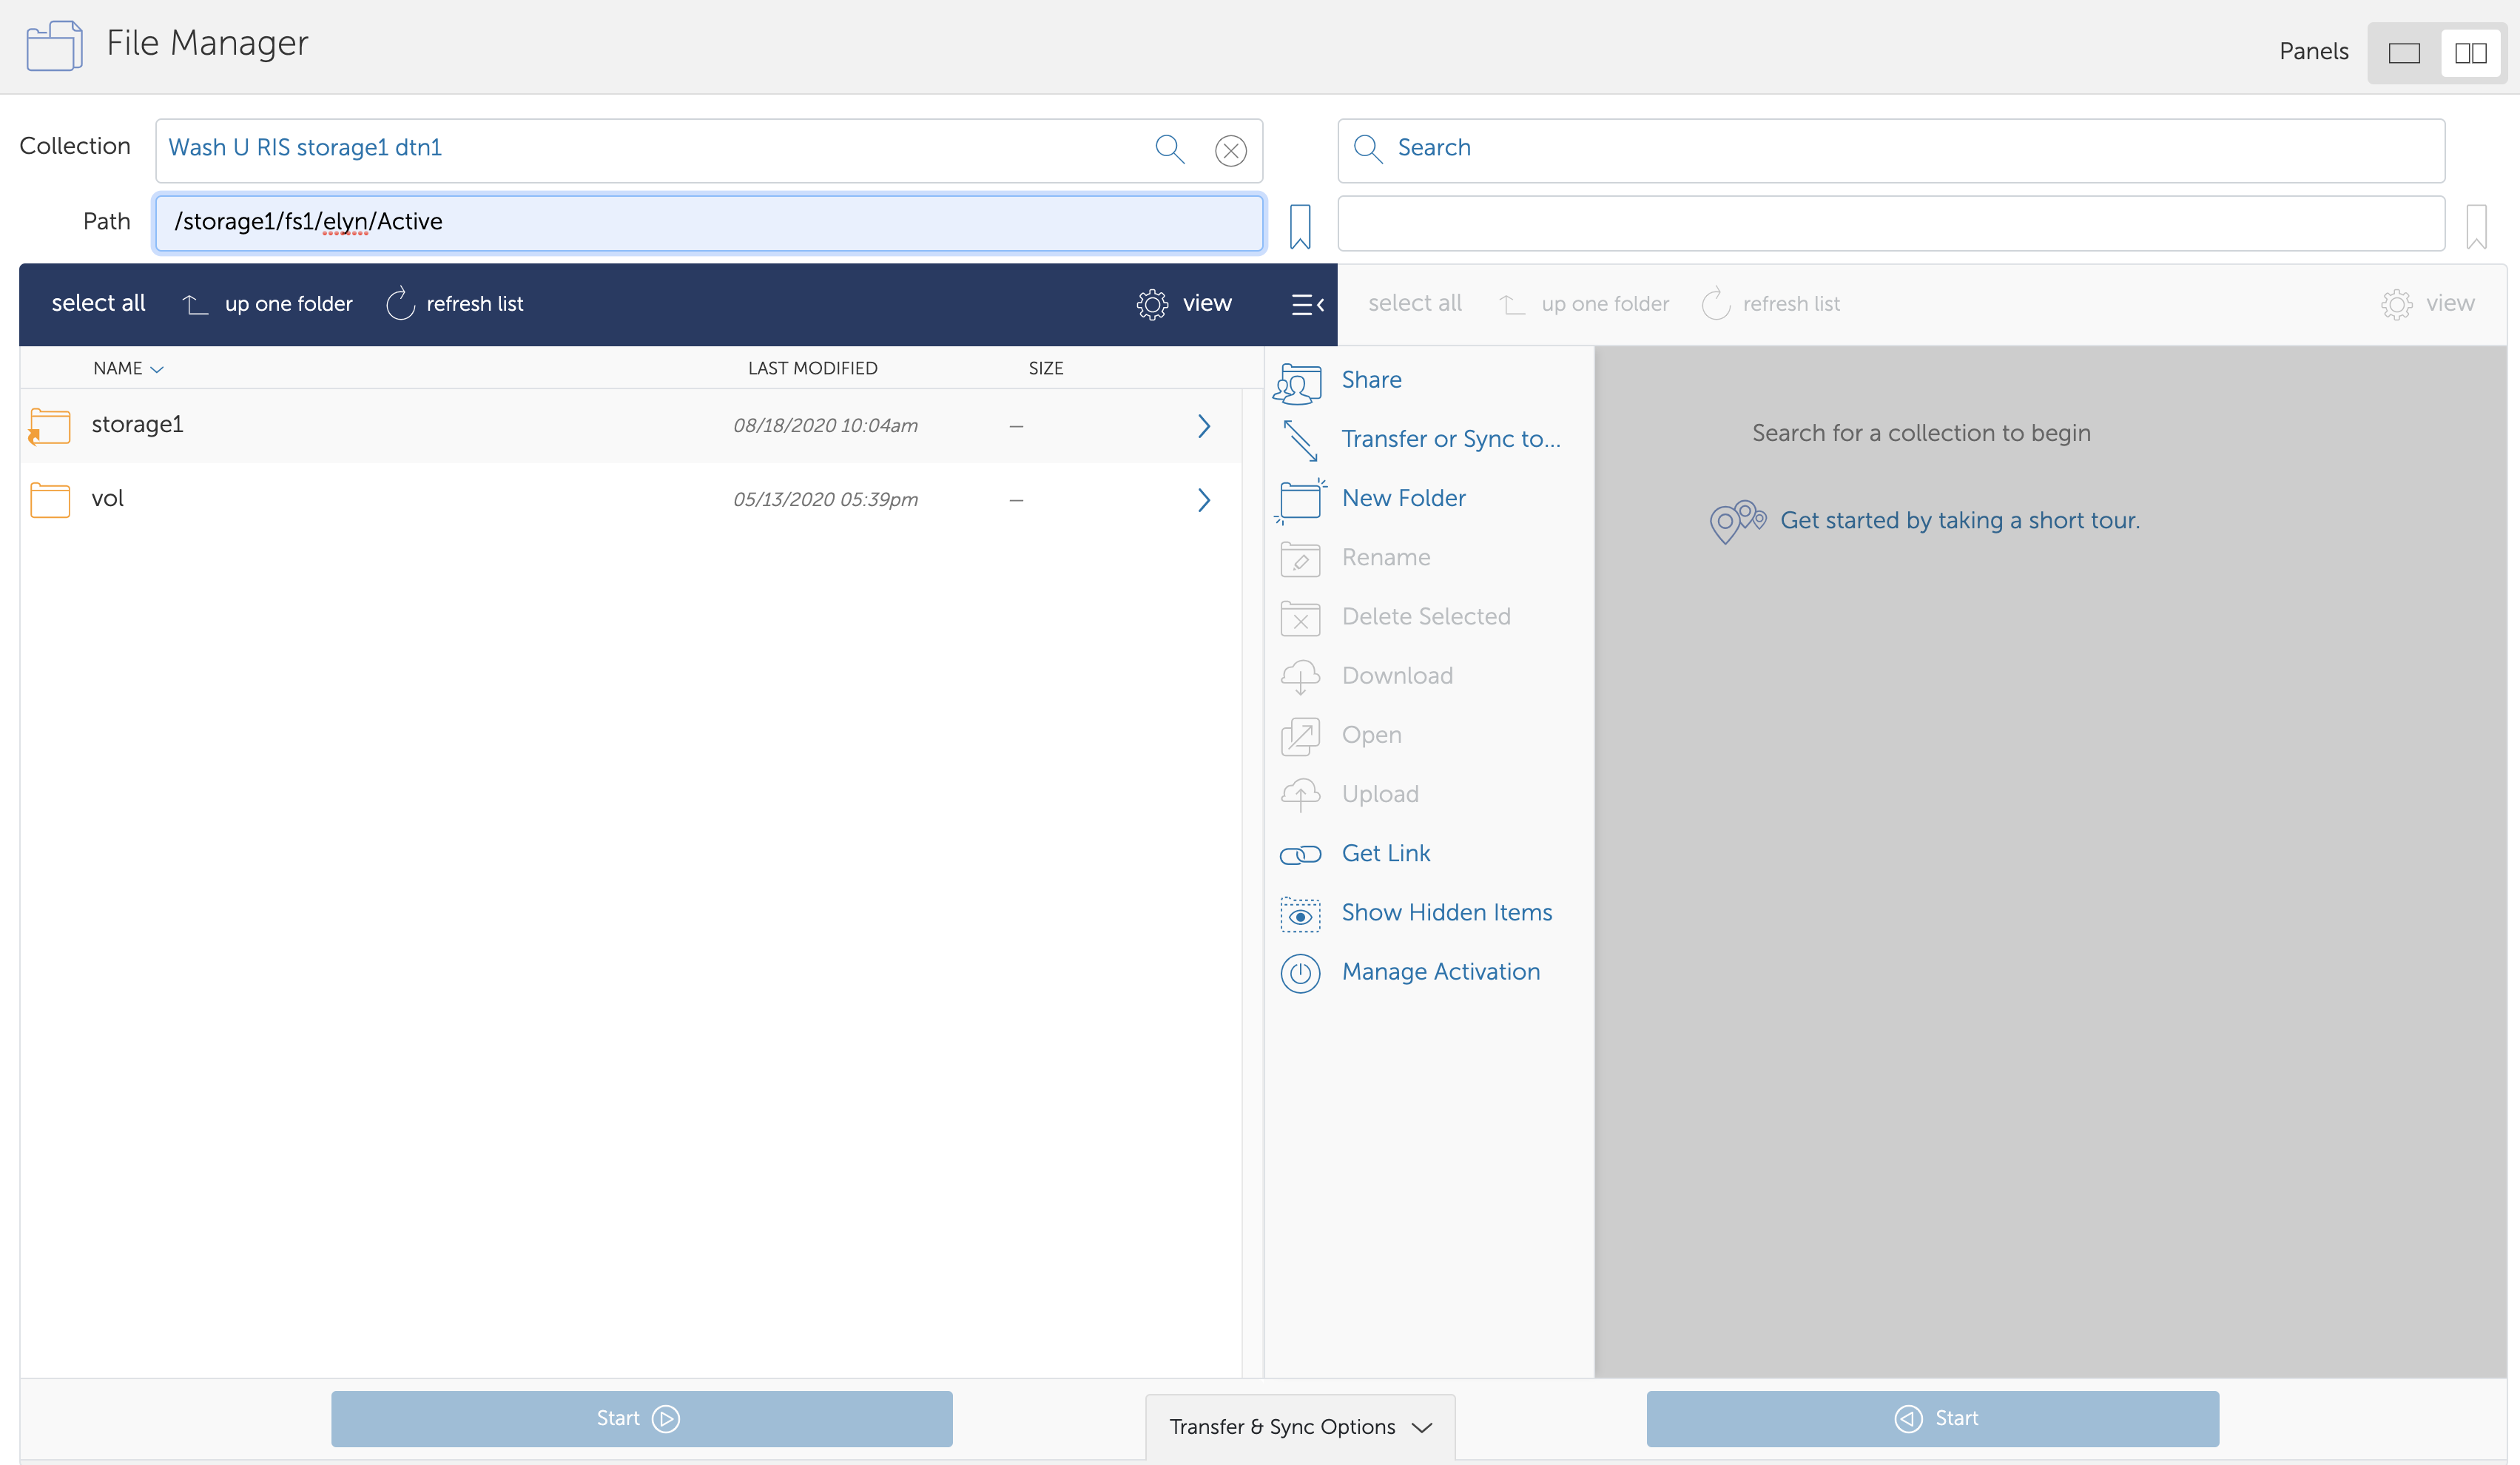
4. Request a file transfer
Click Transfer or Sync to… in the command panel on the right side of the page. A new collection panel will open, with a “Transfer or Sync to” field at the top of the panel.
You can select the secondary endpoint that you wish to transfer data between. This can be a collection set up by a colleague or even your own personal computer (how to set this up is documented below.)
Click on the file or directory (folder) you wish to transfer and click the start button at the bottom to start the transfer.
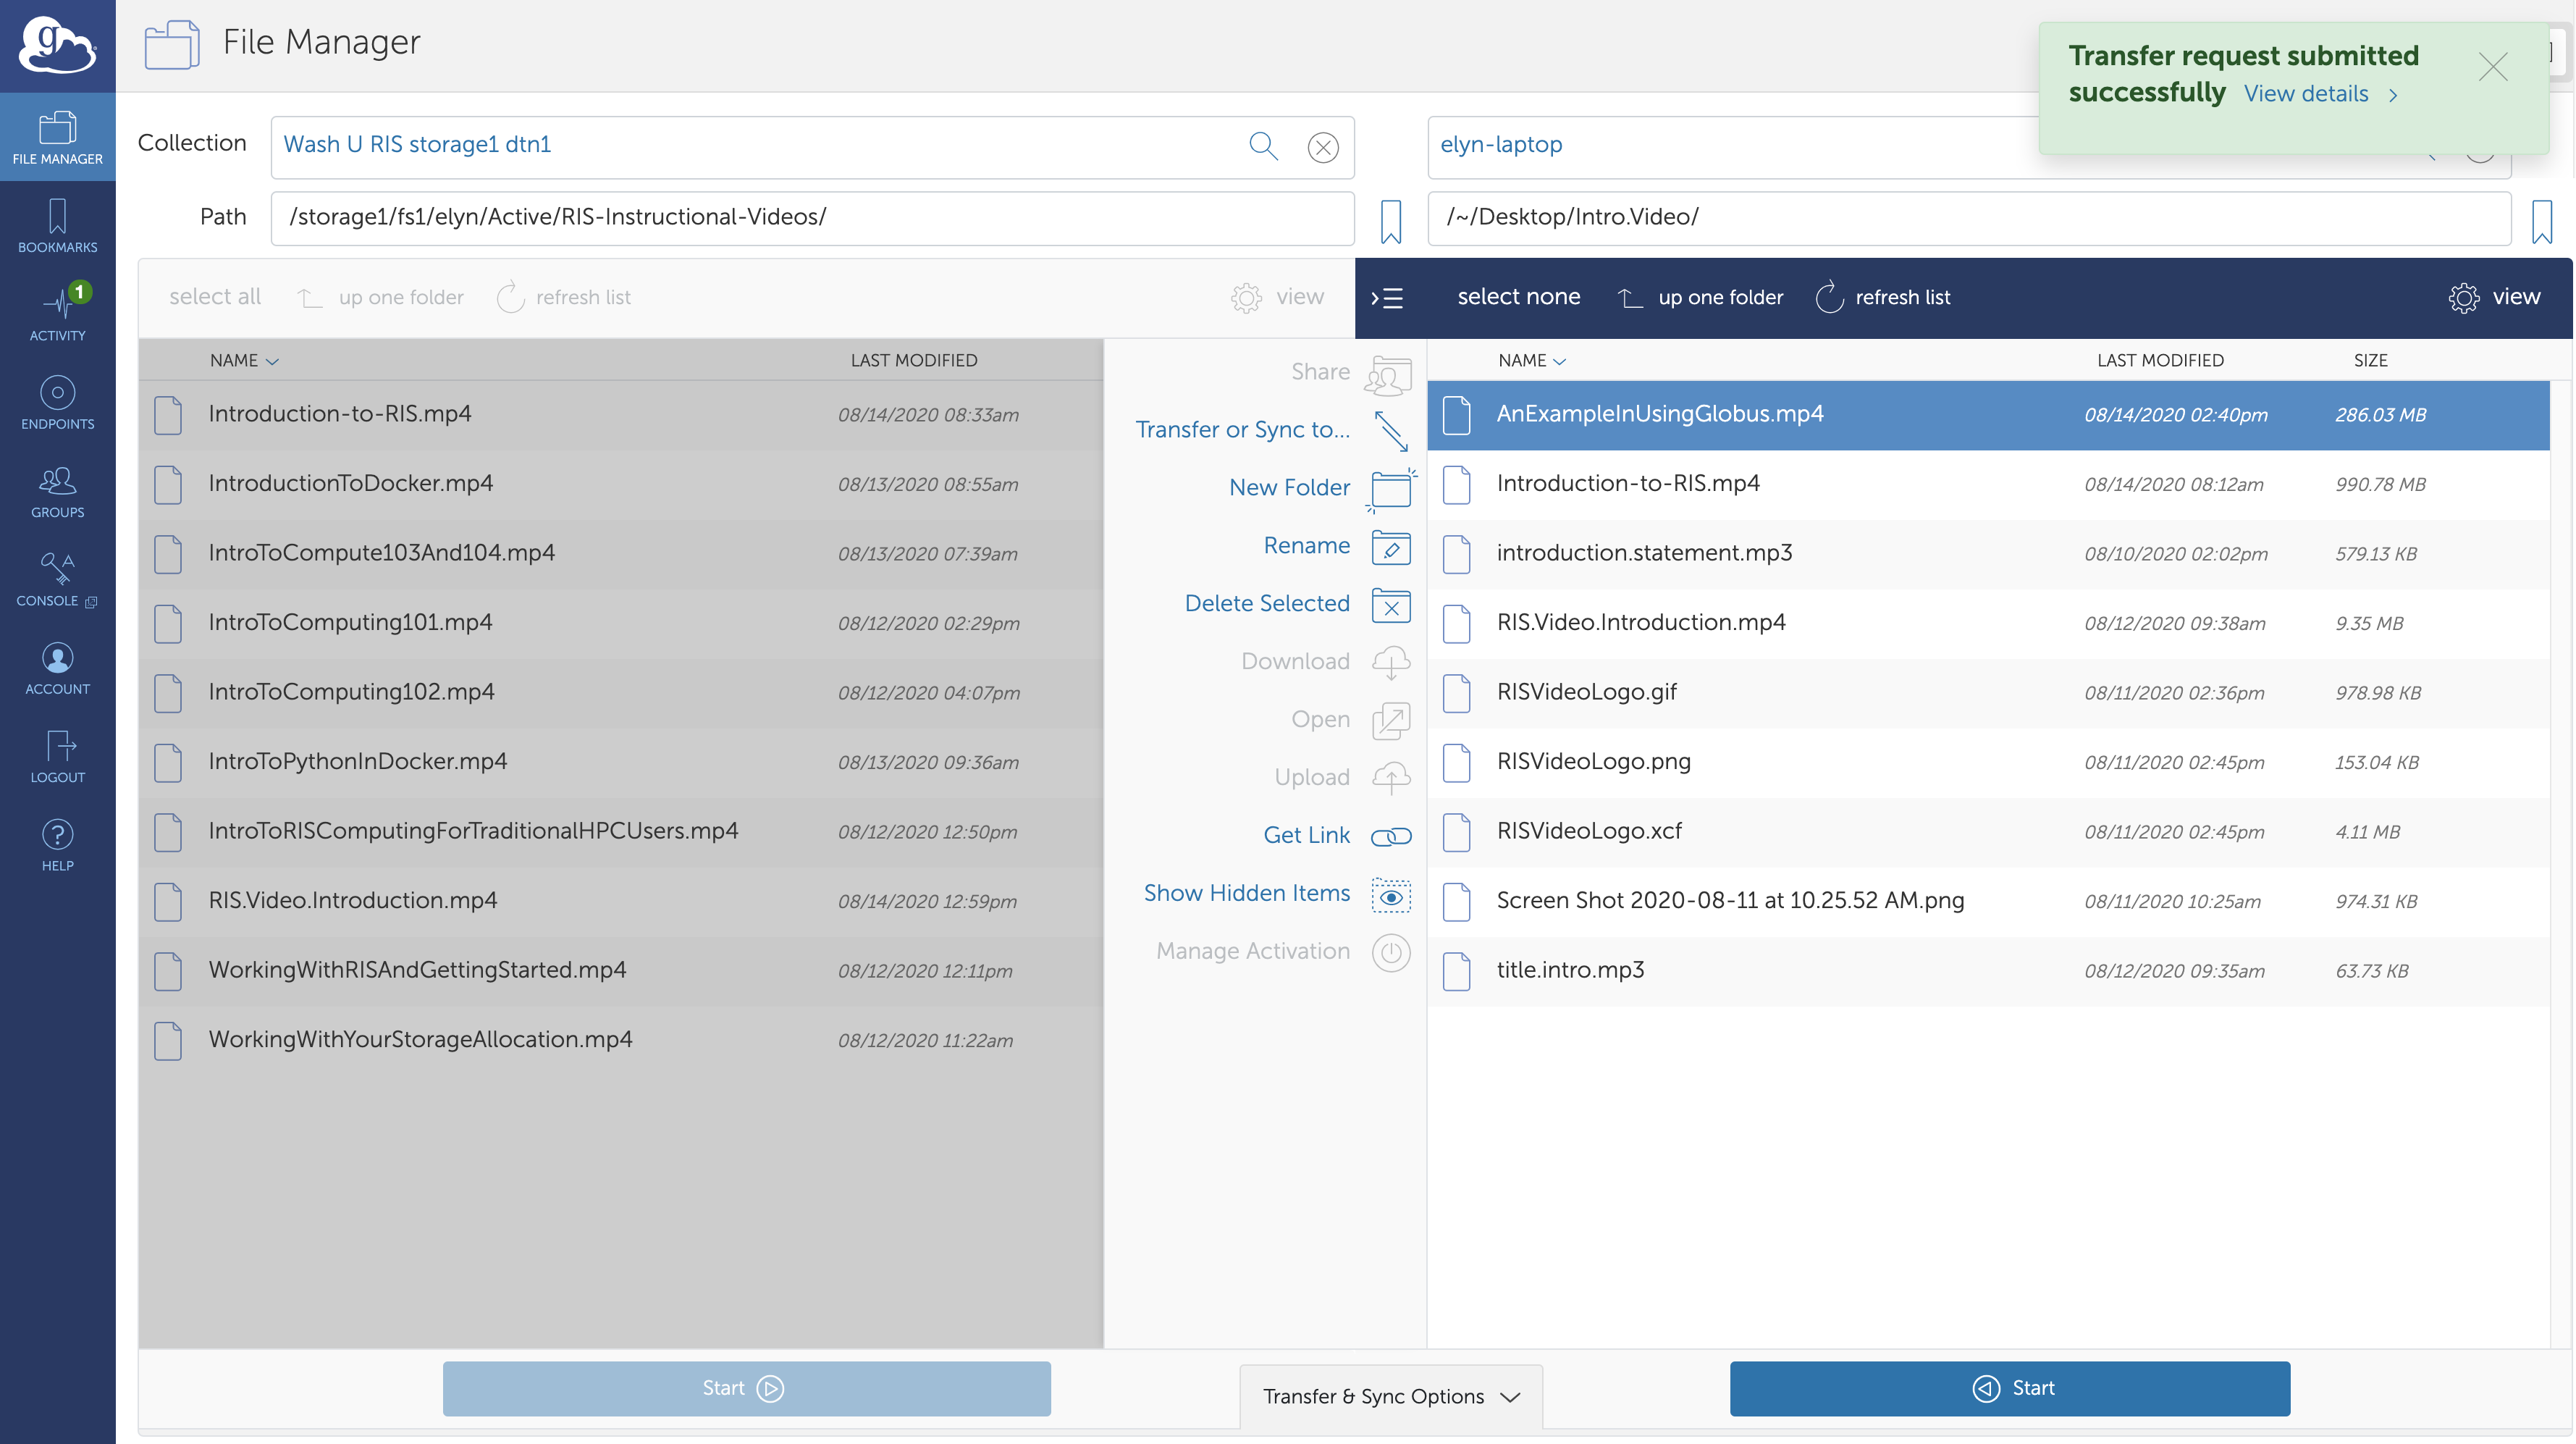
There will be a little green (or red) number in the activity side menu when you have active transfers. This indicates how many you have in the queue and their status. Green means that the transfer is working as expected. Red means that there was an issue.
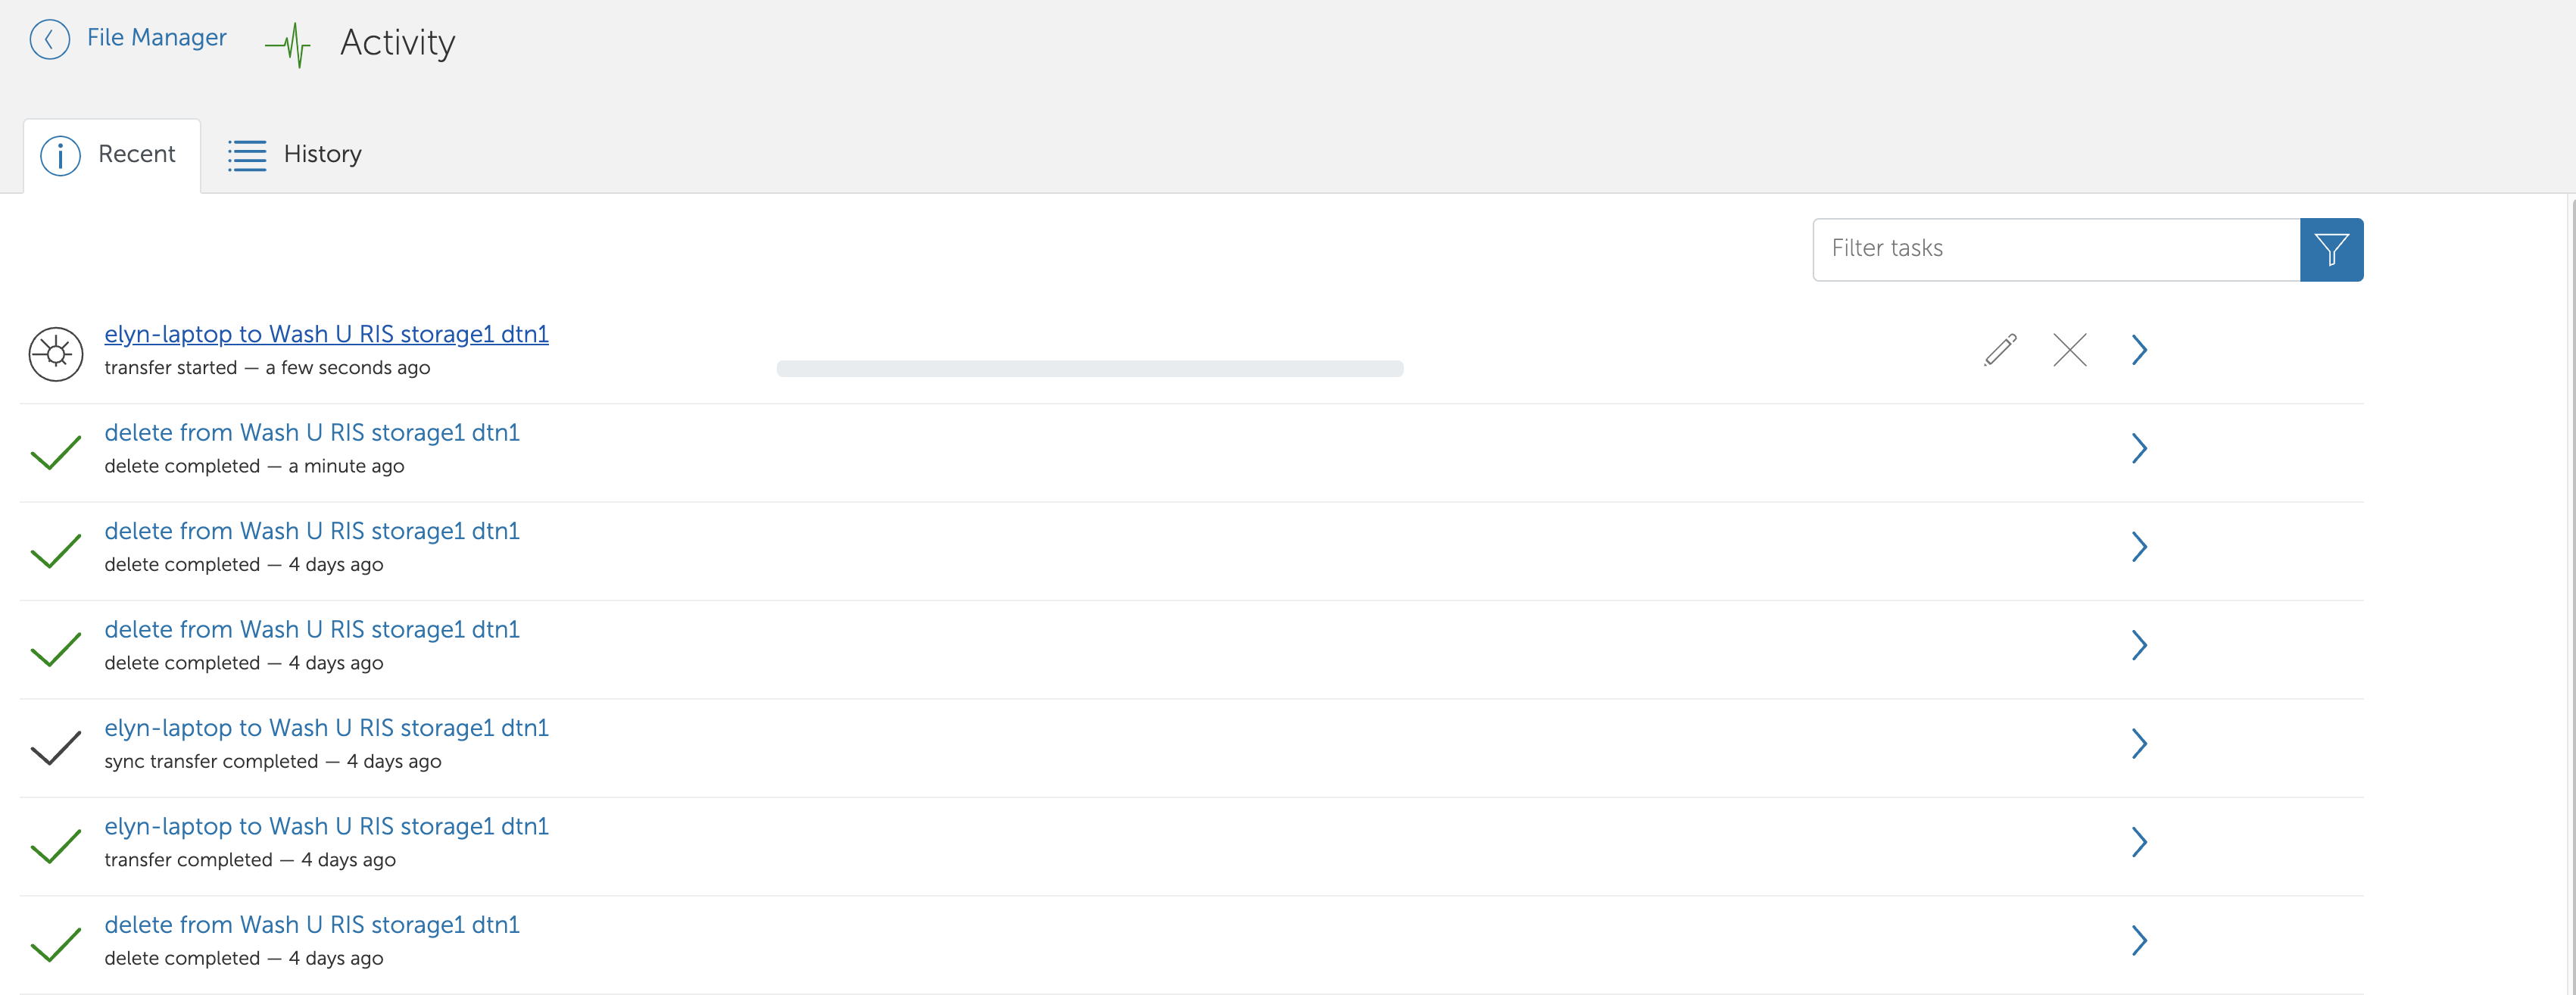
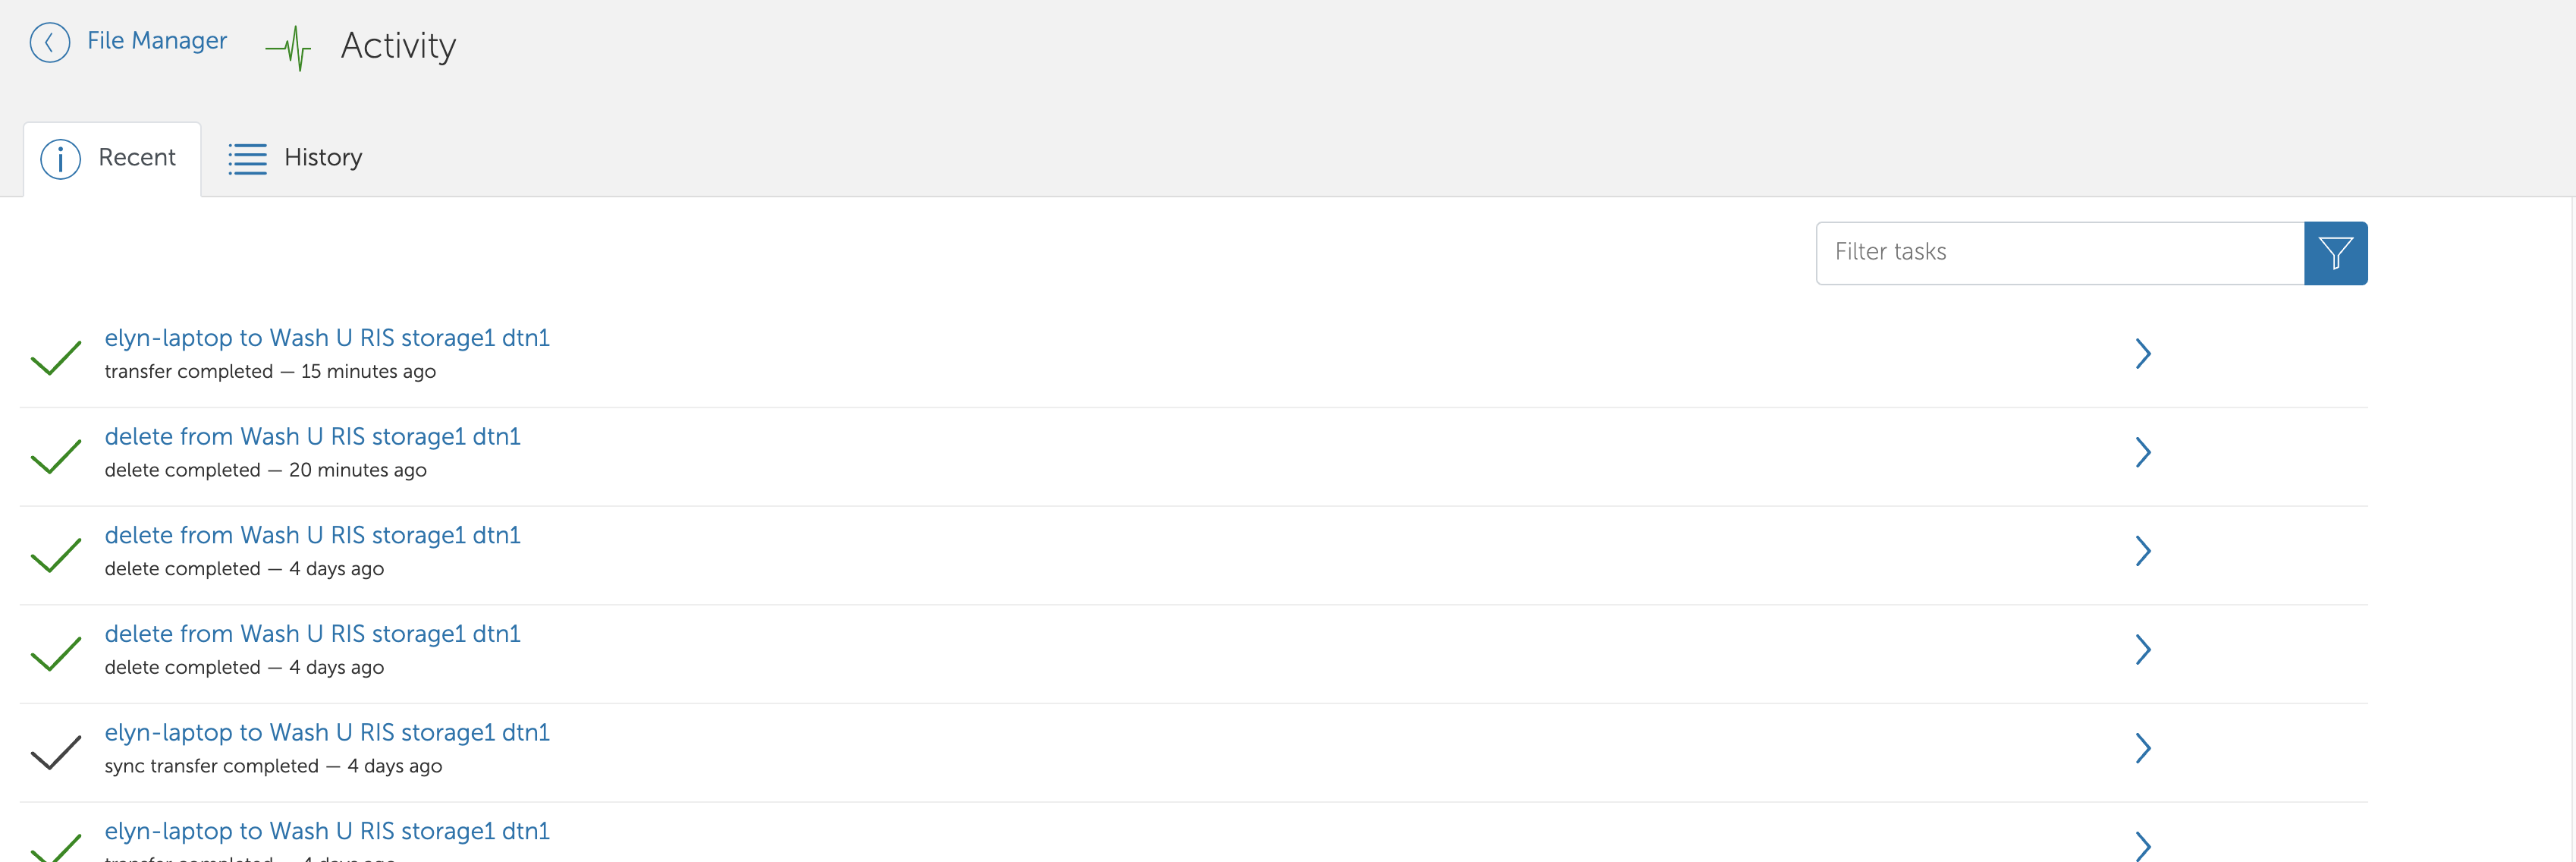
When you go to the Activity page you can see your active and previous transfers. If you click on the arrow to the right of the transfer information, you can get more details on that transfer.
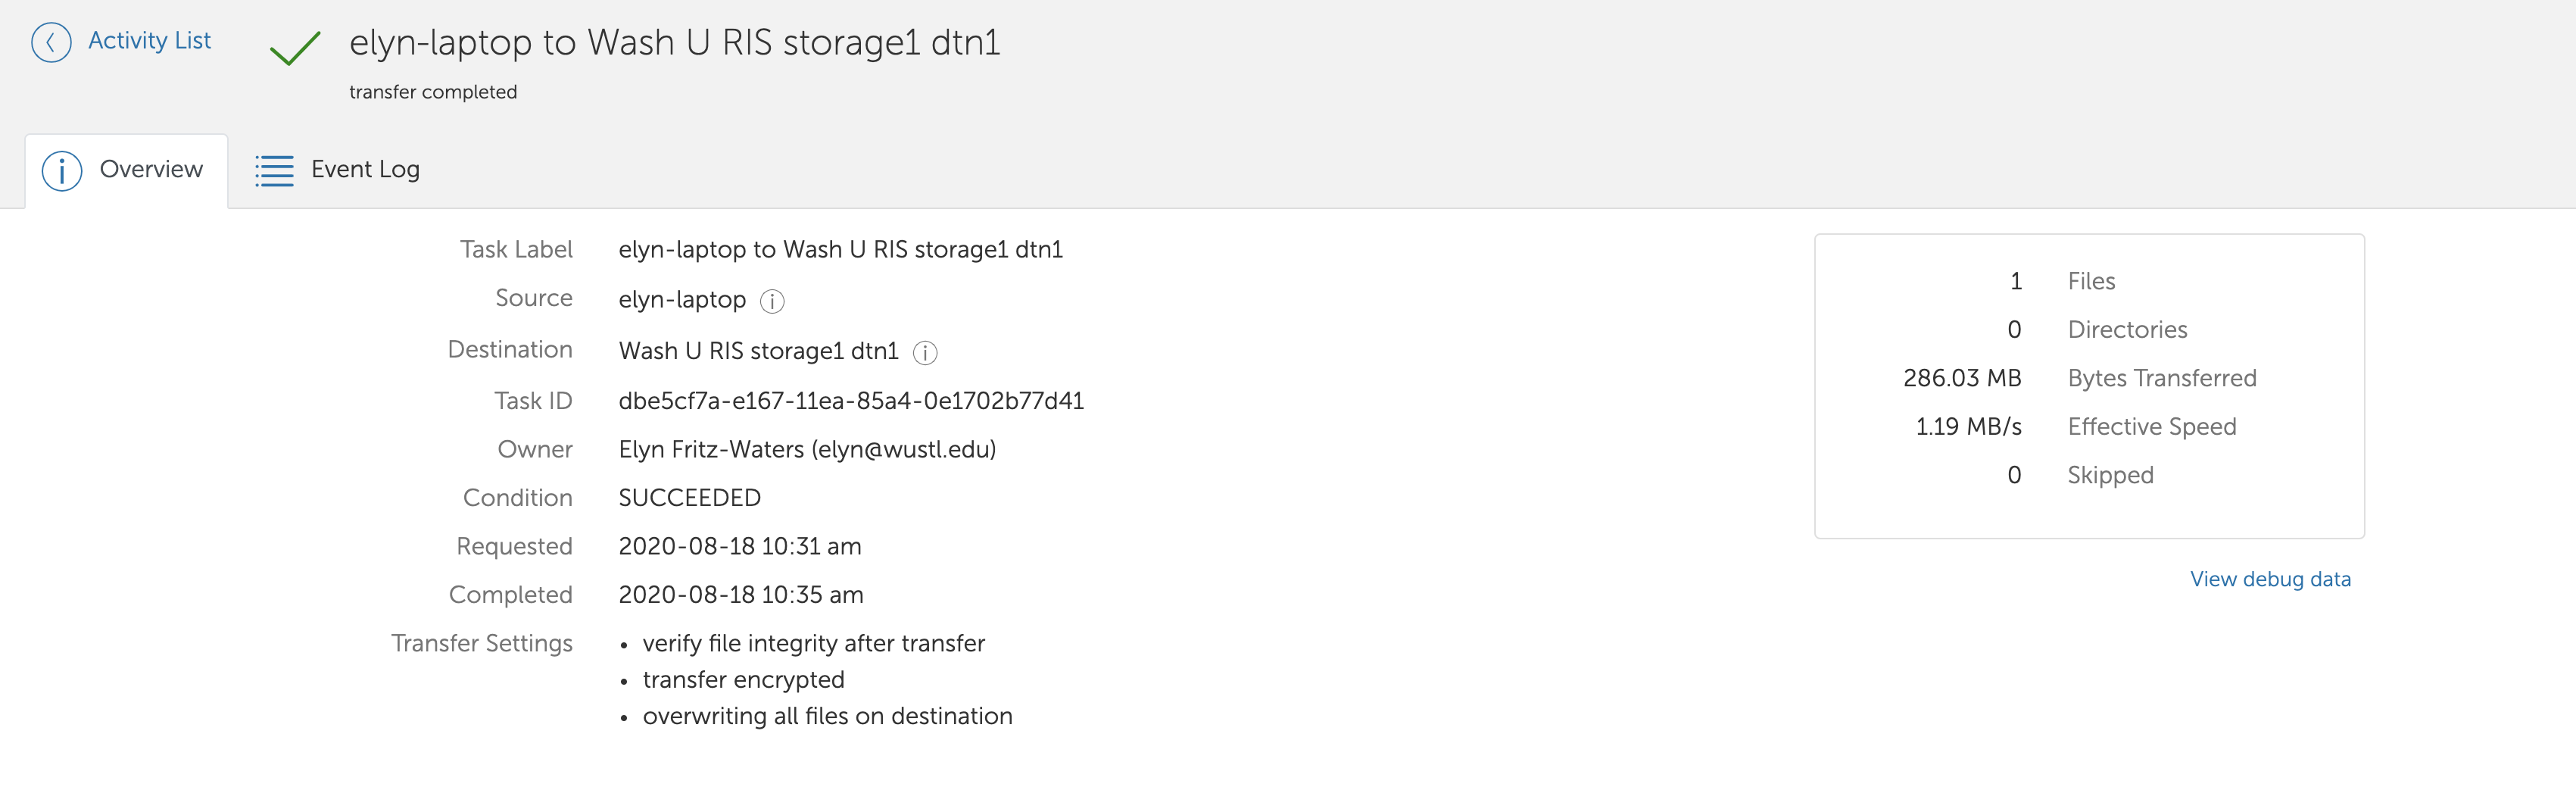
Between the two Start buttons at the bottom of the page, the Transfer & Sync Options tab provides access to several options. If you click on it it will bring up options.

- verify file integrity after transfer
By default, Globus verifies file integrity after transfer using checksums.
- sync - only transfer new or changed files
You have the option to sync the data. This means that only new or changed files are transferred. A good thing to use if you use storageN as a back up.
This will not delete files on storageN that are not on your local computer or endpoint. It will simply at to them.
- delete files on destination that do not exist on source
Selecting this option will delete files that are on the destination that are NOT on the source of the transfer.
Warning
This option is not recommended for most users.
- preserve source file modification times
This option preserves the modification times of a file as save on the source of the transfer.
If a file is created on your local laptop on Monday and you transfer it to storageN on Thursday, with this option, the modification time listed on storageN will be Monday, instead of Thursday (the default option).
Note
After you request a file transfer, Globus takes over and does the work on your behalf. You can navigate away from the File Manager, close the browser window, and even logout.
Globus will optimize the transfer for performance, monitor the transfer for completion and correctness, and recover from network errors and collection downtime.
The Globus service routinely achieves high availability, providing nearly uninterrupted oversight of data transfers taking place on much less reliable networks and collection hosts.
When a problem is encountered part-way through the transfer, Globus resumes from the point of failure and does not retransmit all of the data specified in the original request.
Globus can handle extremely large data transfers, even those that don’t complete within the authentication expiration period of a collection (which is controlled by the collection administrator).
If your credentials expire before the transfer completes, Globus will notify you to re-authenticate on the collection, after which Globus will continue the transfer from where it was paused.
These wide-ranging capabilities make data transfer with Globus truly “fire-and-forget.”
5. Confirm transfer completion
You can confirm the transfer is complete in the Activity page. You will also be emailed about the status of your transfer once it is complete, or if it errors.
Sharing Data (“Collections”)
Update User Collections
All collections that have been created by users will need to be updated to use the new DTN (RIS Storage1) as the other DTNs will be phased out.
With Globus, you can easily share research data with your collaborators. You don’t need to create accounts on the server(s) where your data is stored.
You can share data with anyone using their identity or their email address.
To share data, you’ll create a guest collection and grant your collaborators access as described in the instructions below.
Note
Sharing with guest collections is available on Globus endpoints managed by an active subscription. You can create guest collections on Globus Connect Personal endpoints (your laptop, for example) if you are a Globus Plus user. Please contact your research computing center or IT manager to upgrade your Globus account to Plus. If your institution does not have a subscription, please contact us to discuss your needs.
1. Log Into Globus and Navigate to the File Manager
Select the collection that has the files/folders you wish to share and, if necessary, activate the collection.
Highlight the folder that you would like to share and Click Share in the right command pane.
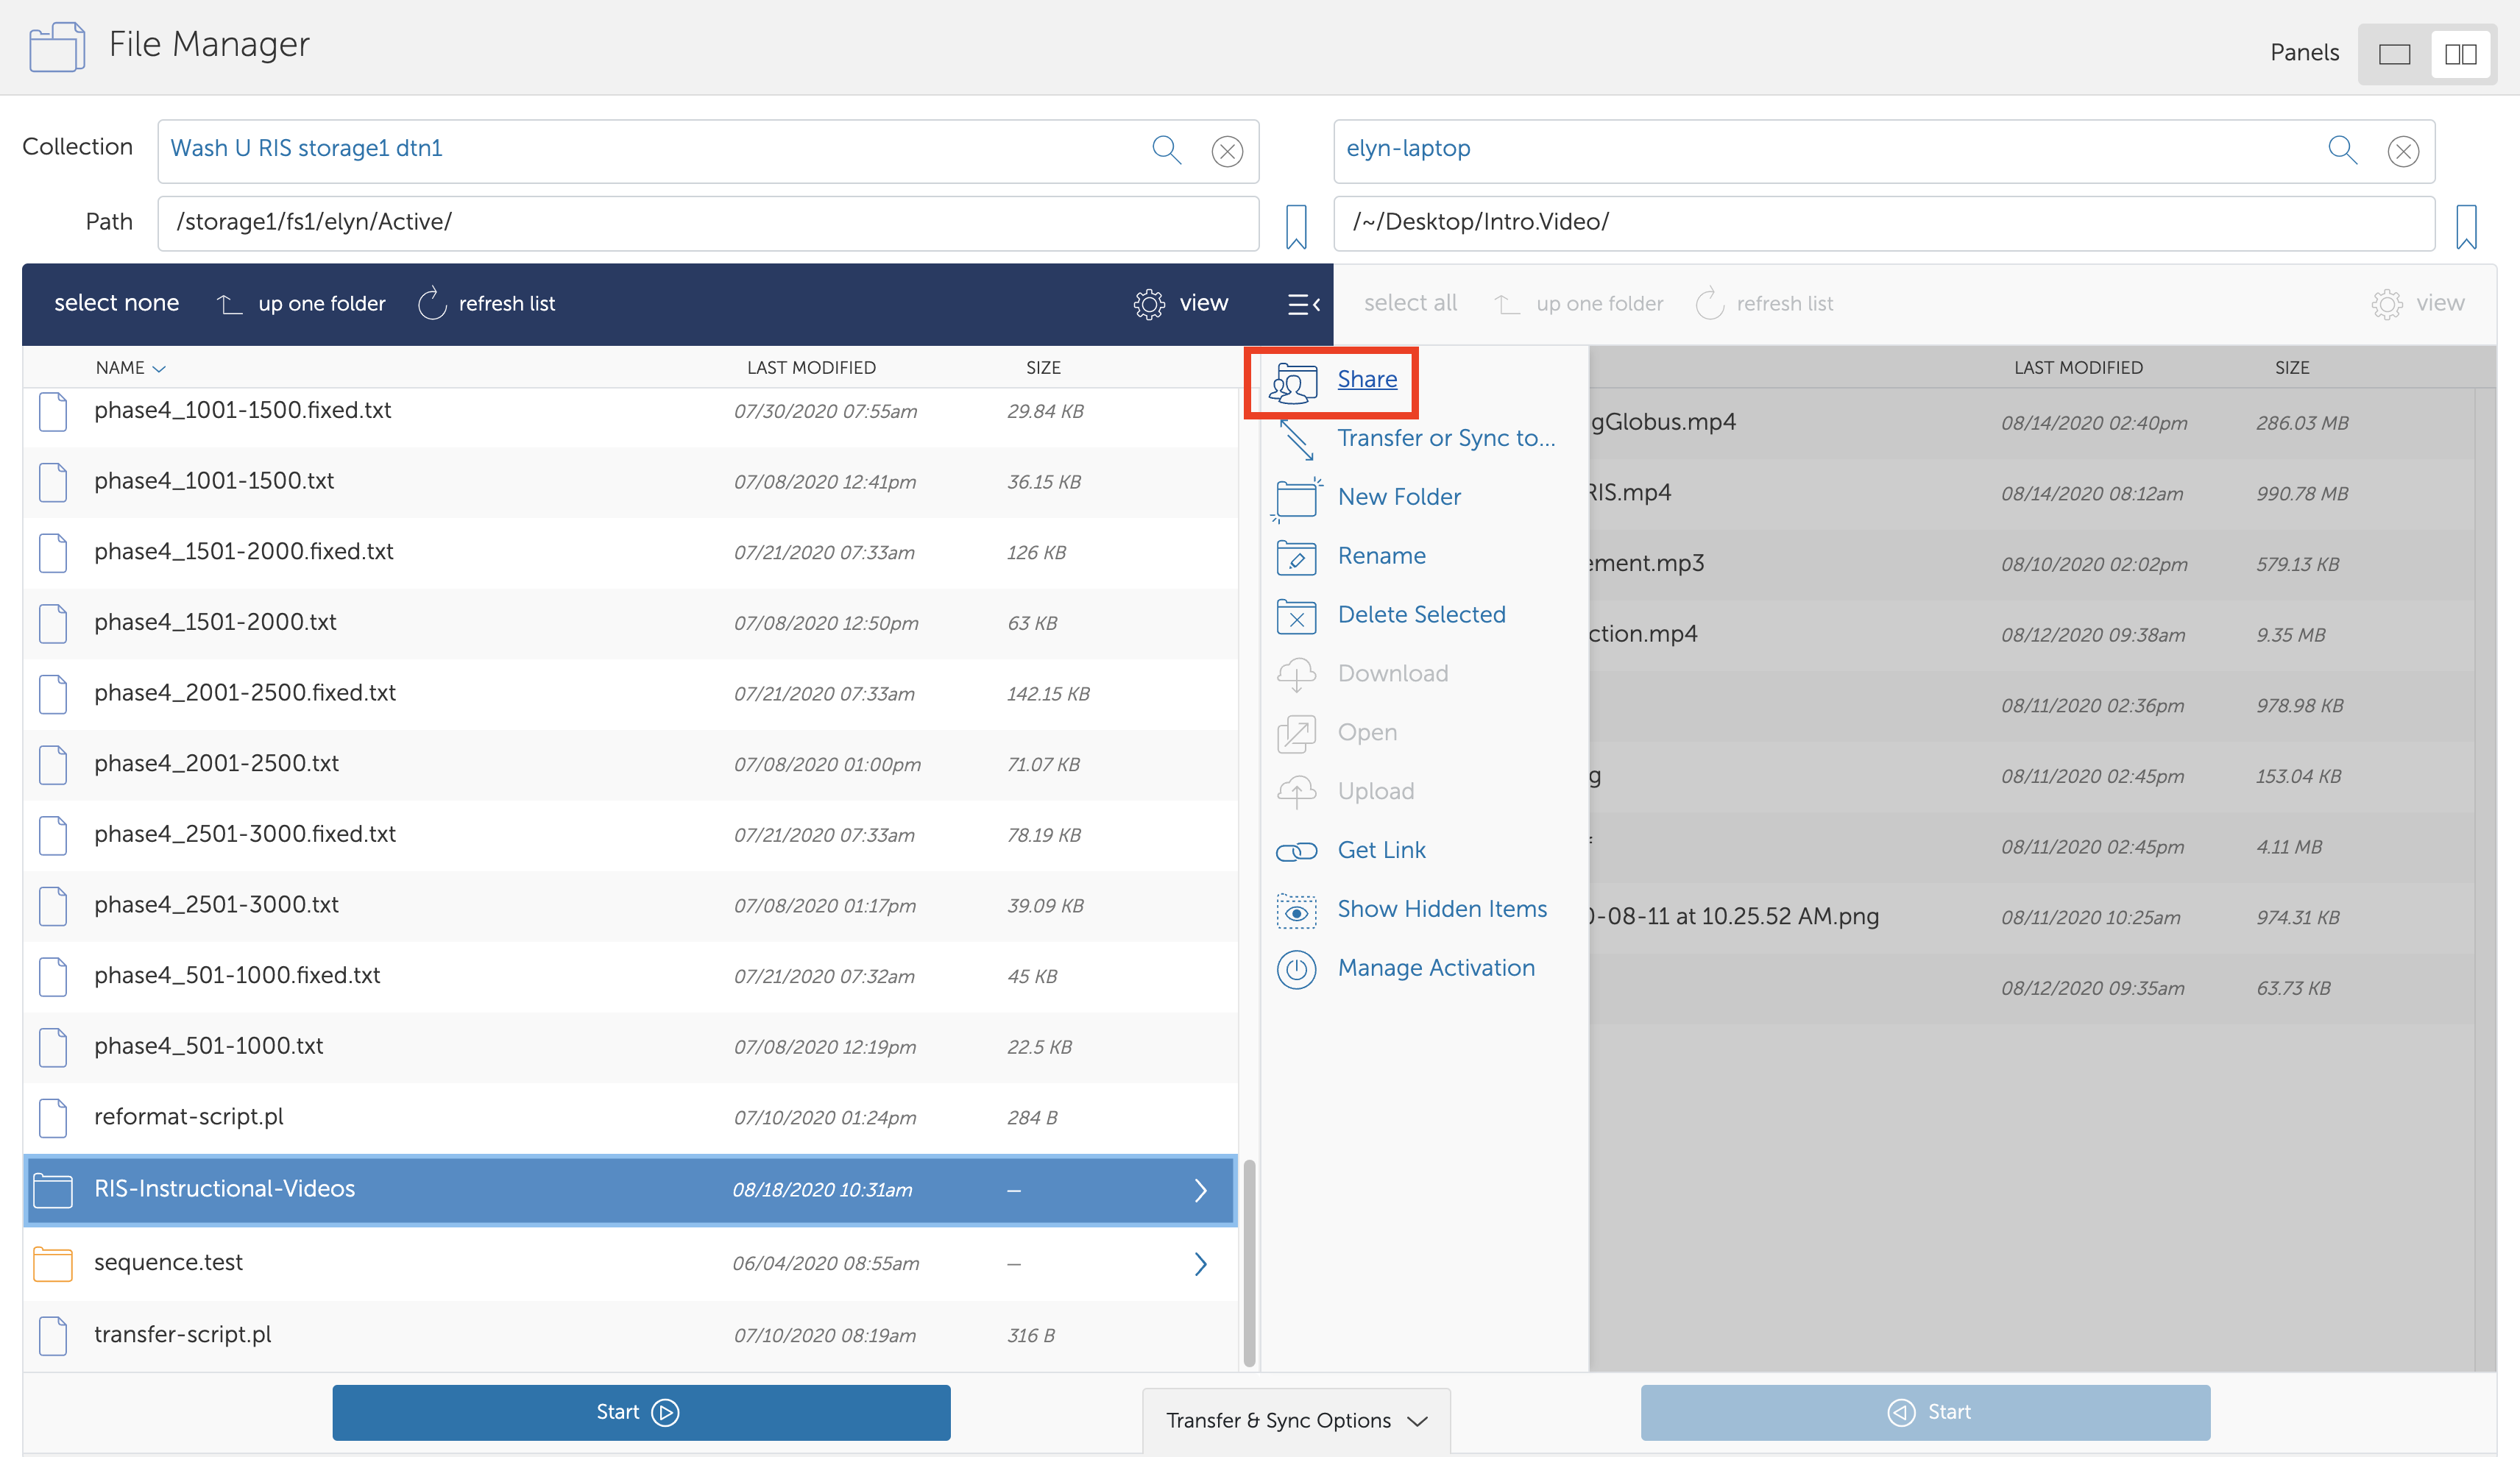
Note
Sharing is available for folders. Individual files can only be shared by sharing the folder that contains them.
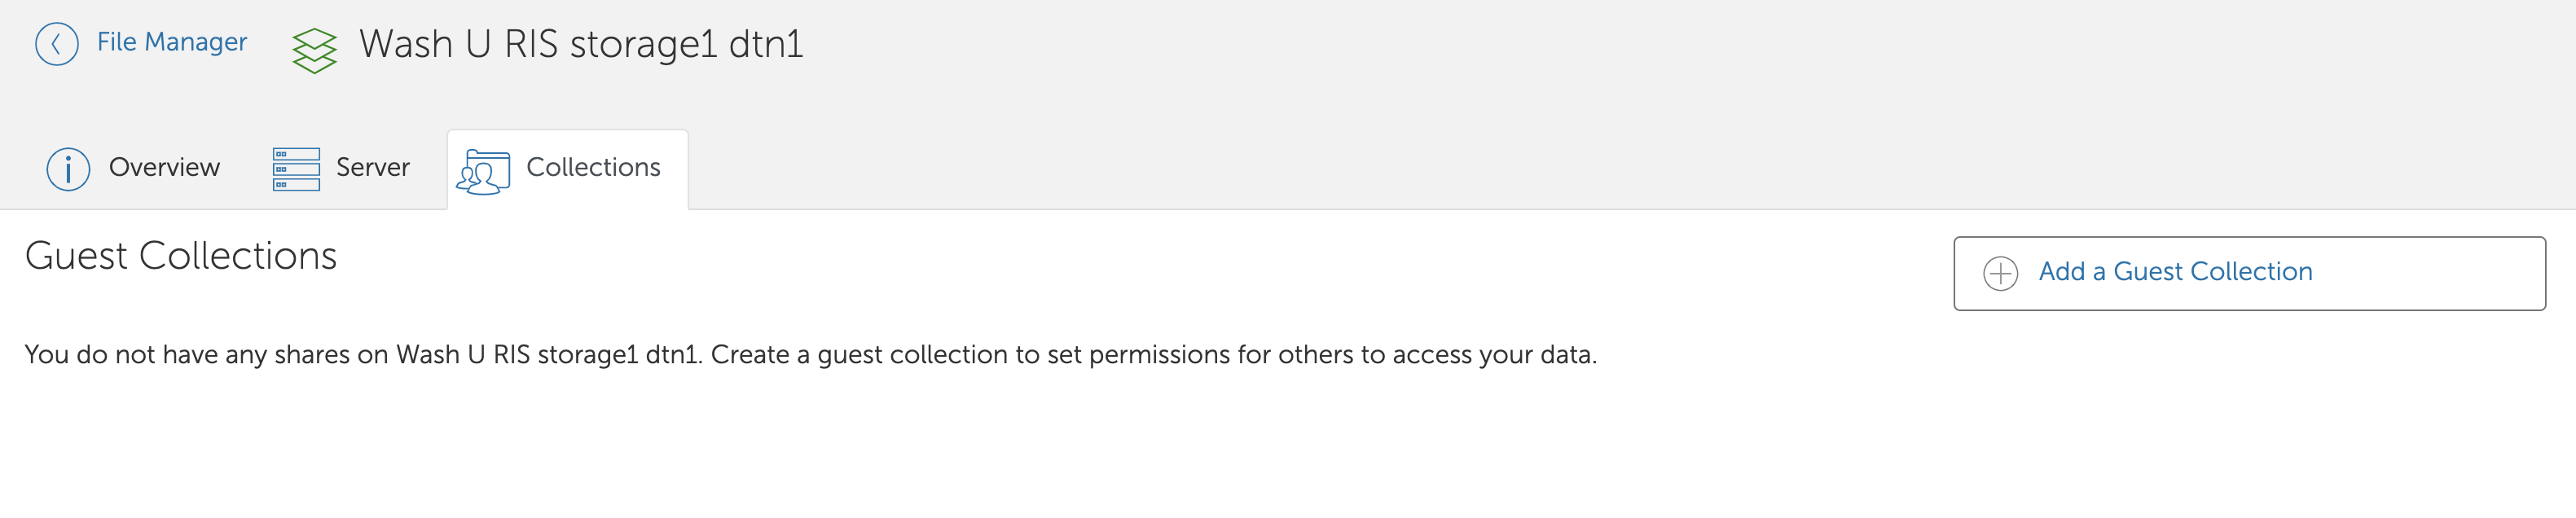
If you do not have a quest collection created, you will need to create one with the Add a Guest Collection button on the right hand side of the page.
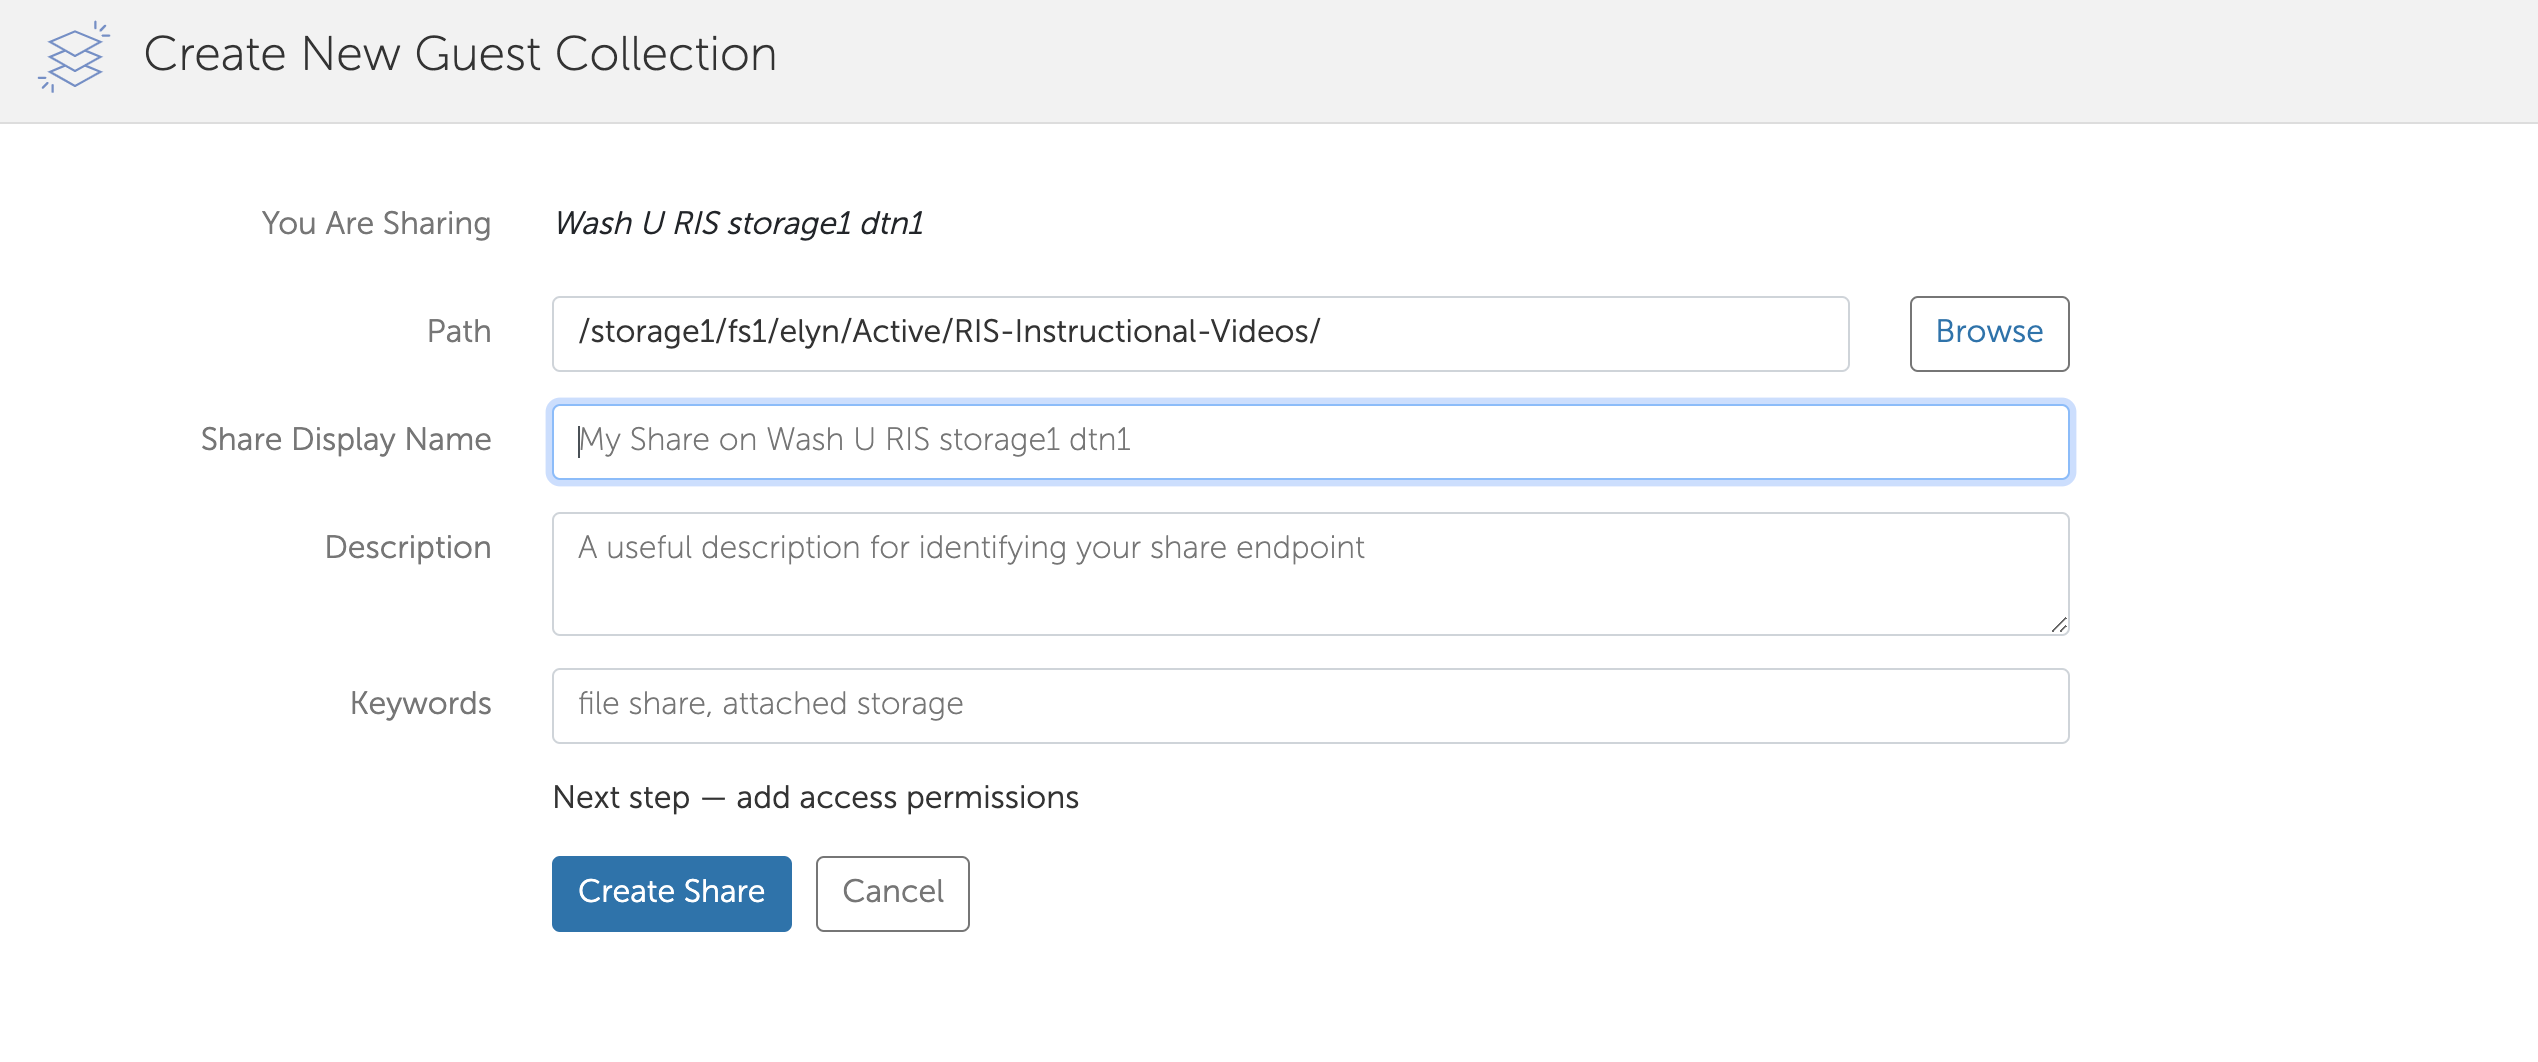
Provide a name for the guest collection, and click Create Share.
When your collection is created, you’ll be taken to the Sharing tab, where you can set permissions. As shown below, the starting permissions give read and write access (and the Administrator role) to the person who created the collection.
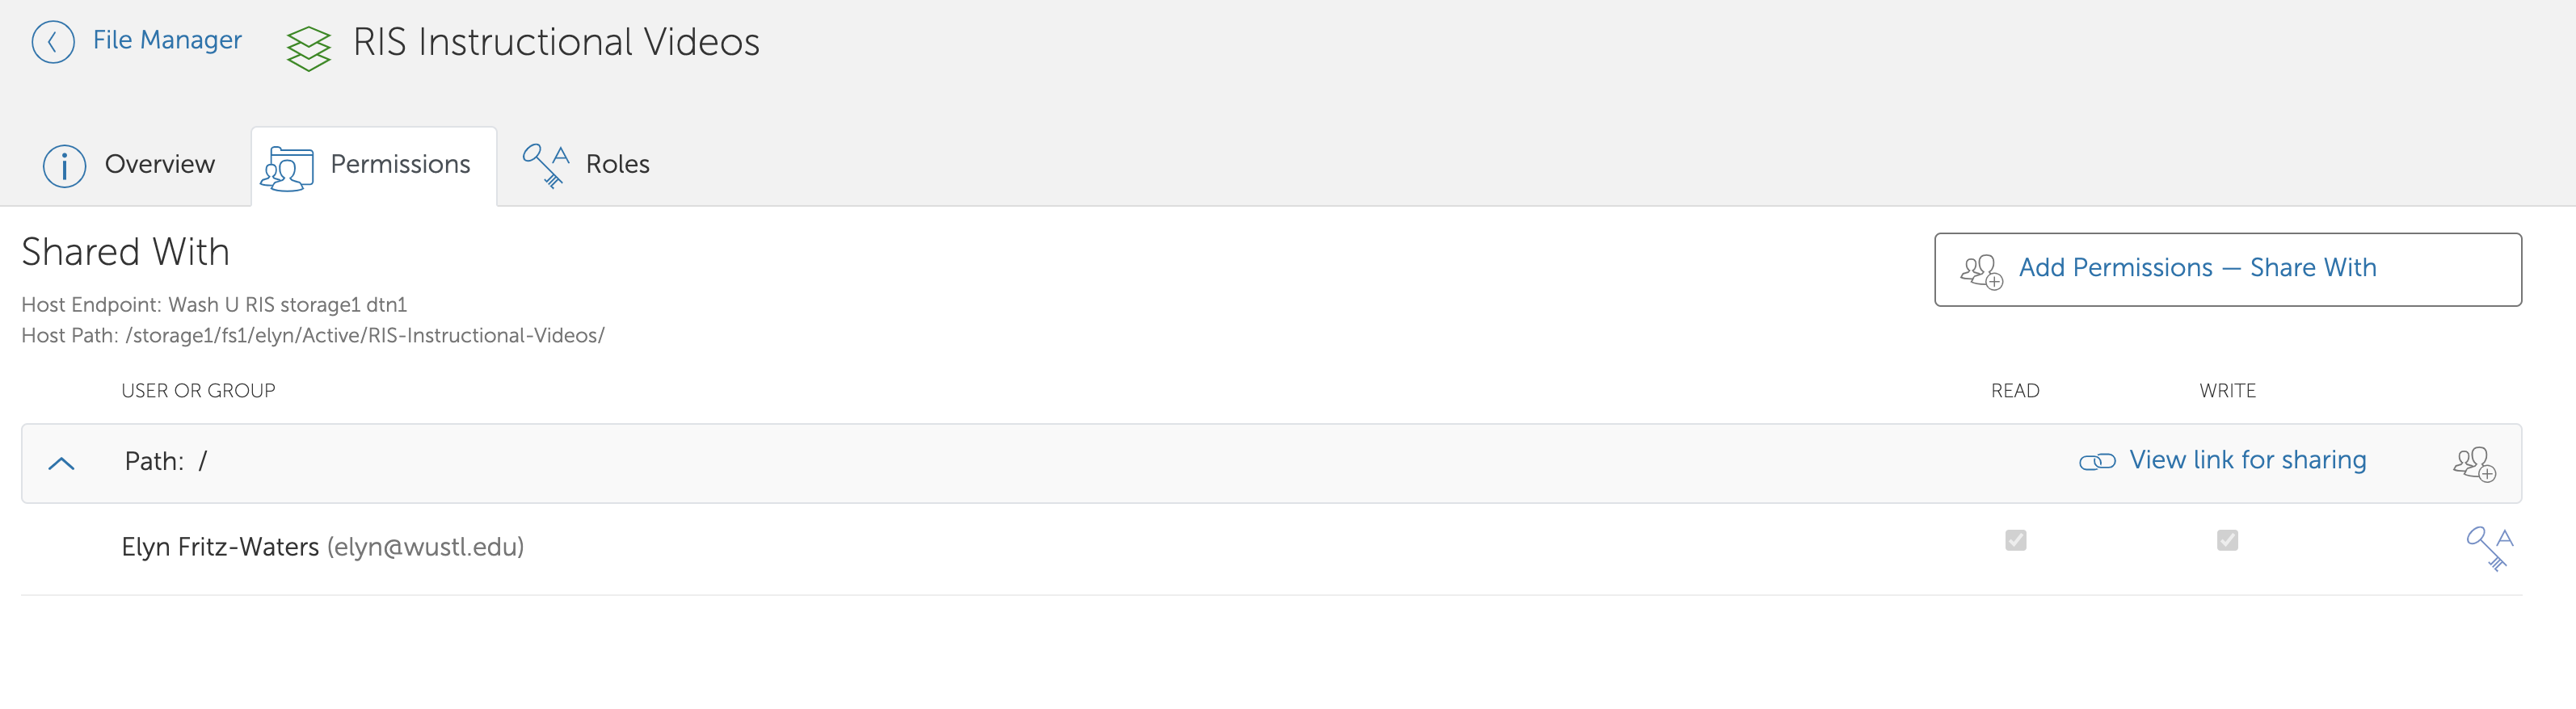
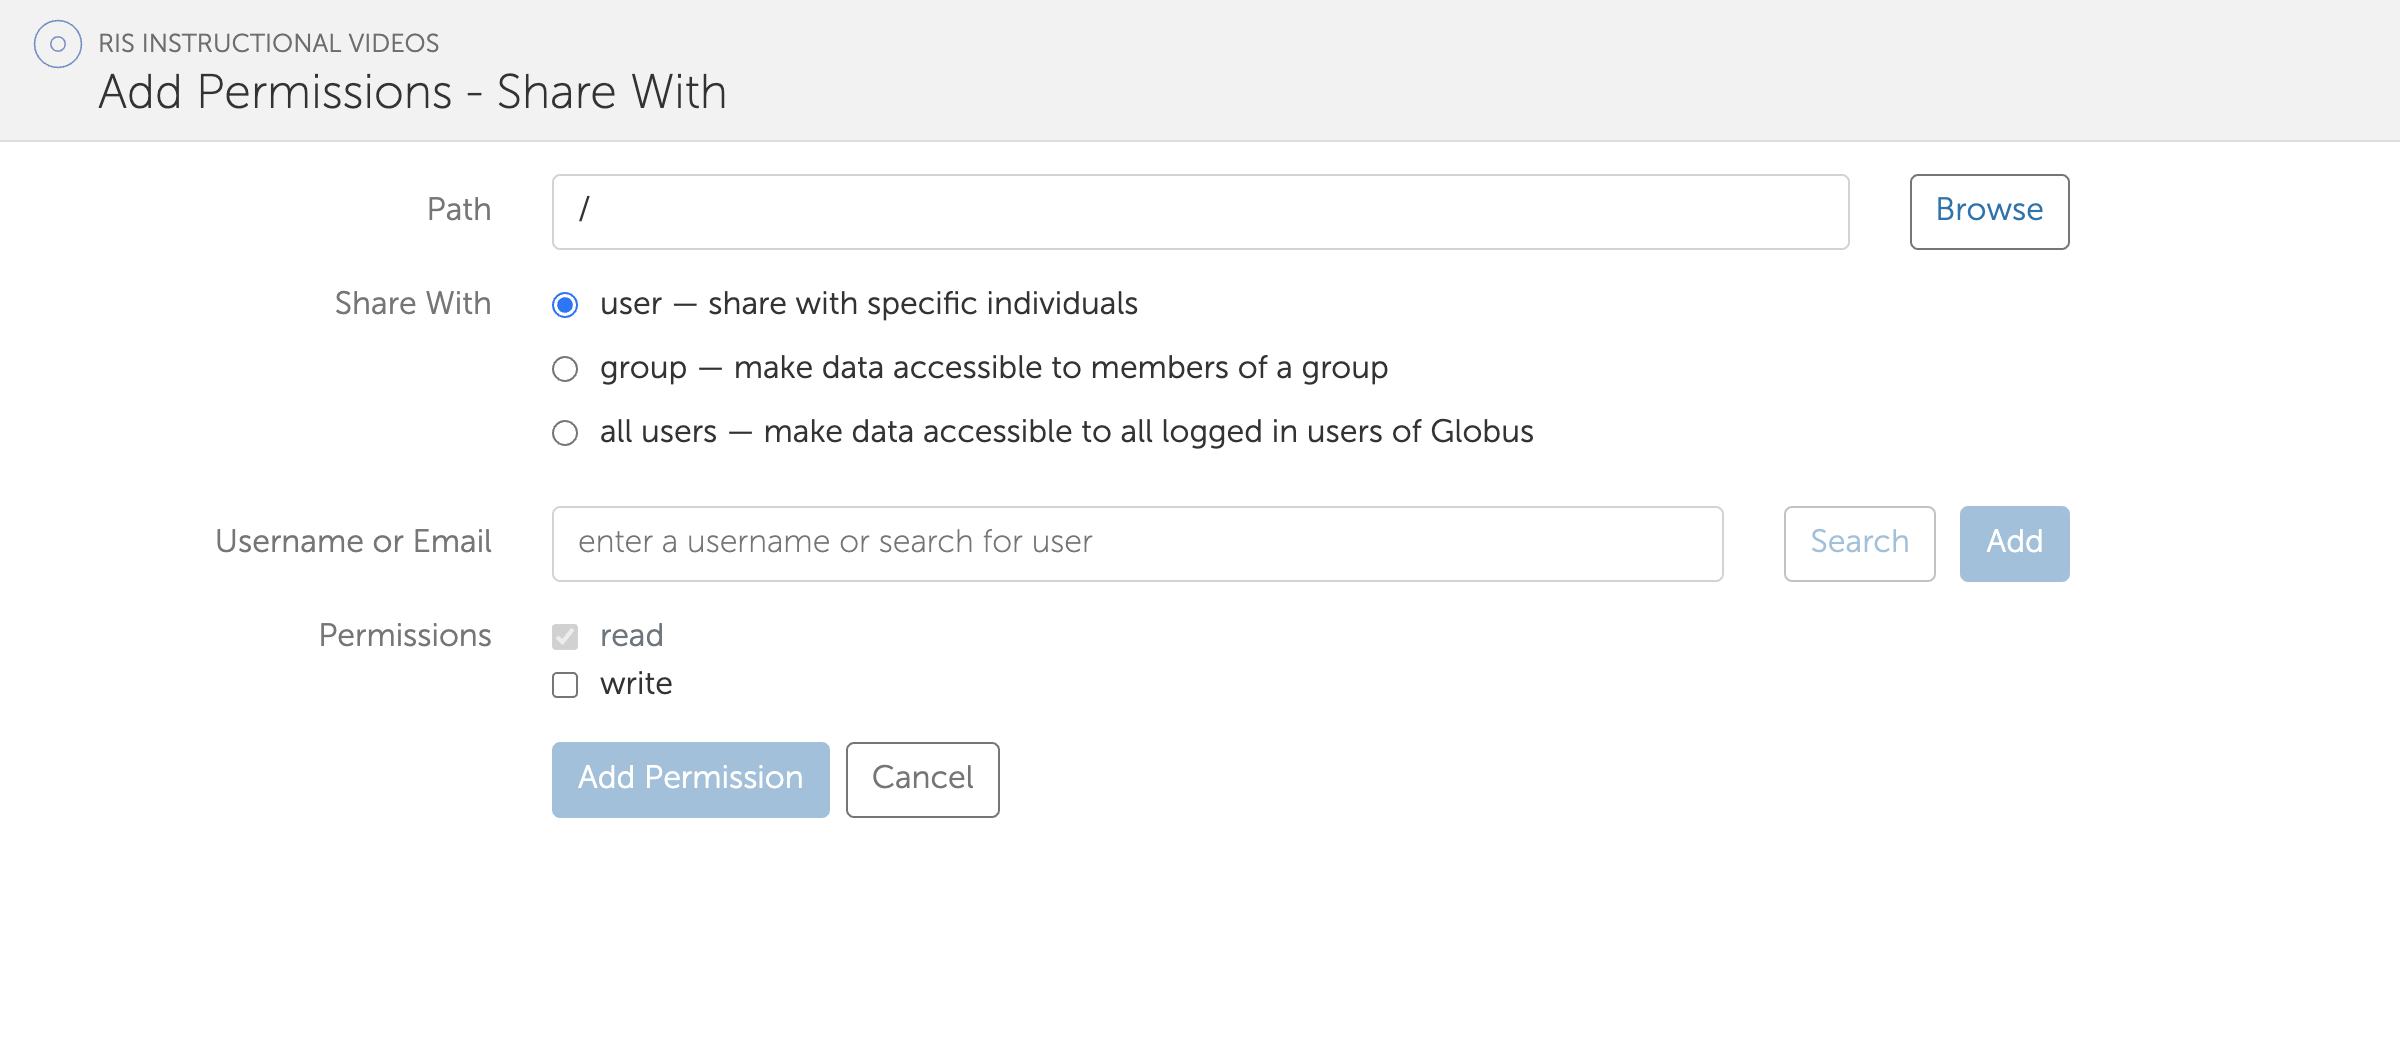
Click the Add Permissions button or icon to share access with others. You can add permissions for an individual user, for a group, or for all logged-in users.
In the Identity/E-mail field, type a person’s name or username (if user is selected) or a group name (if group is selected) and press Enter.
Globus will display matching identities. Pick from the list. If the user hasn’t used Globus before or you only have an email address, enter the email address and click Add.
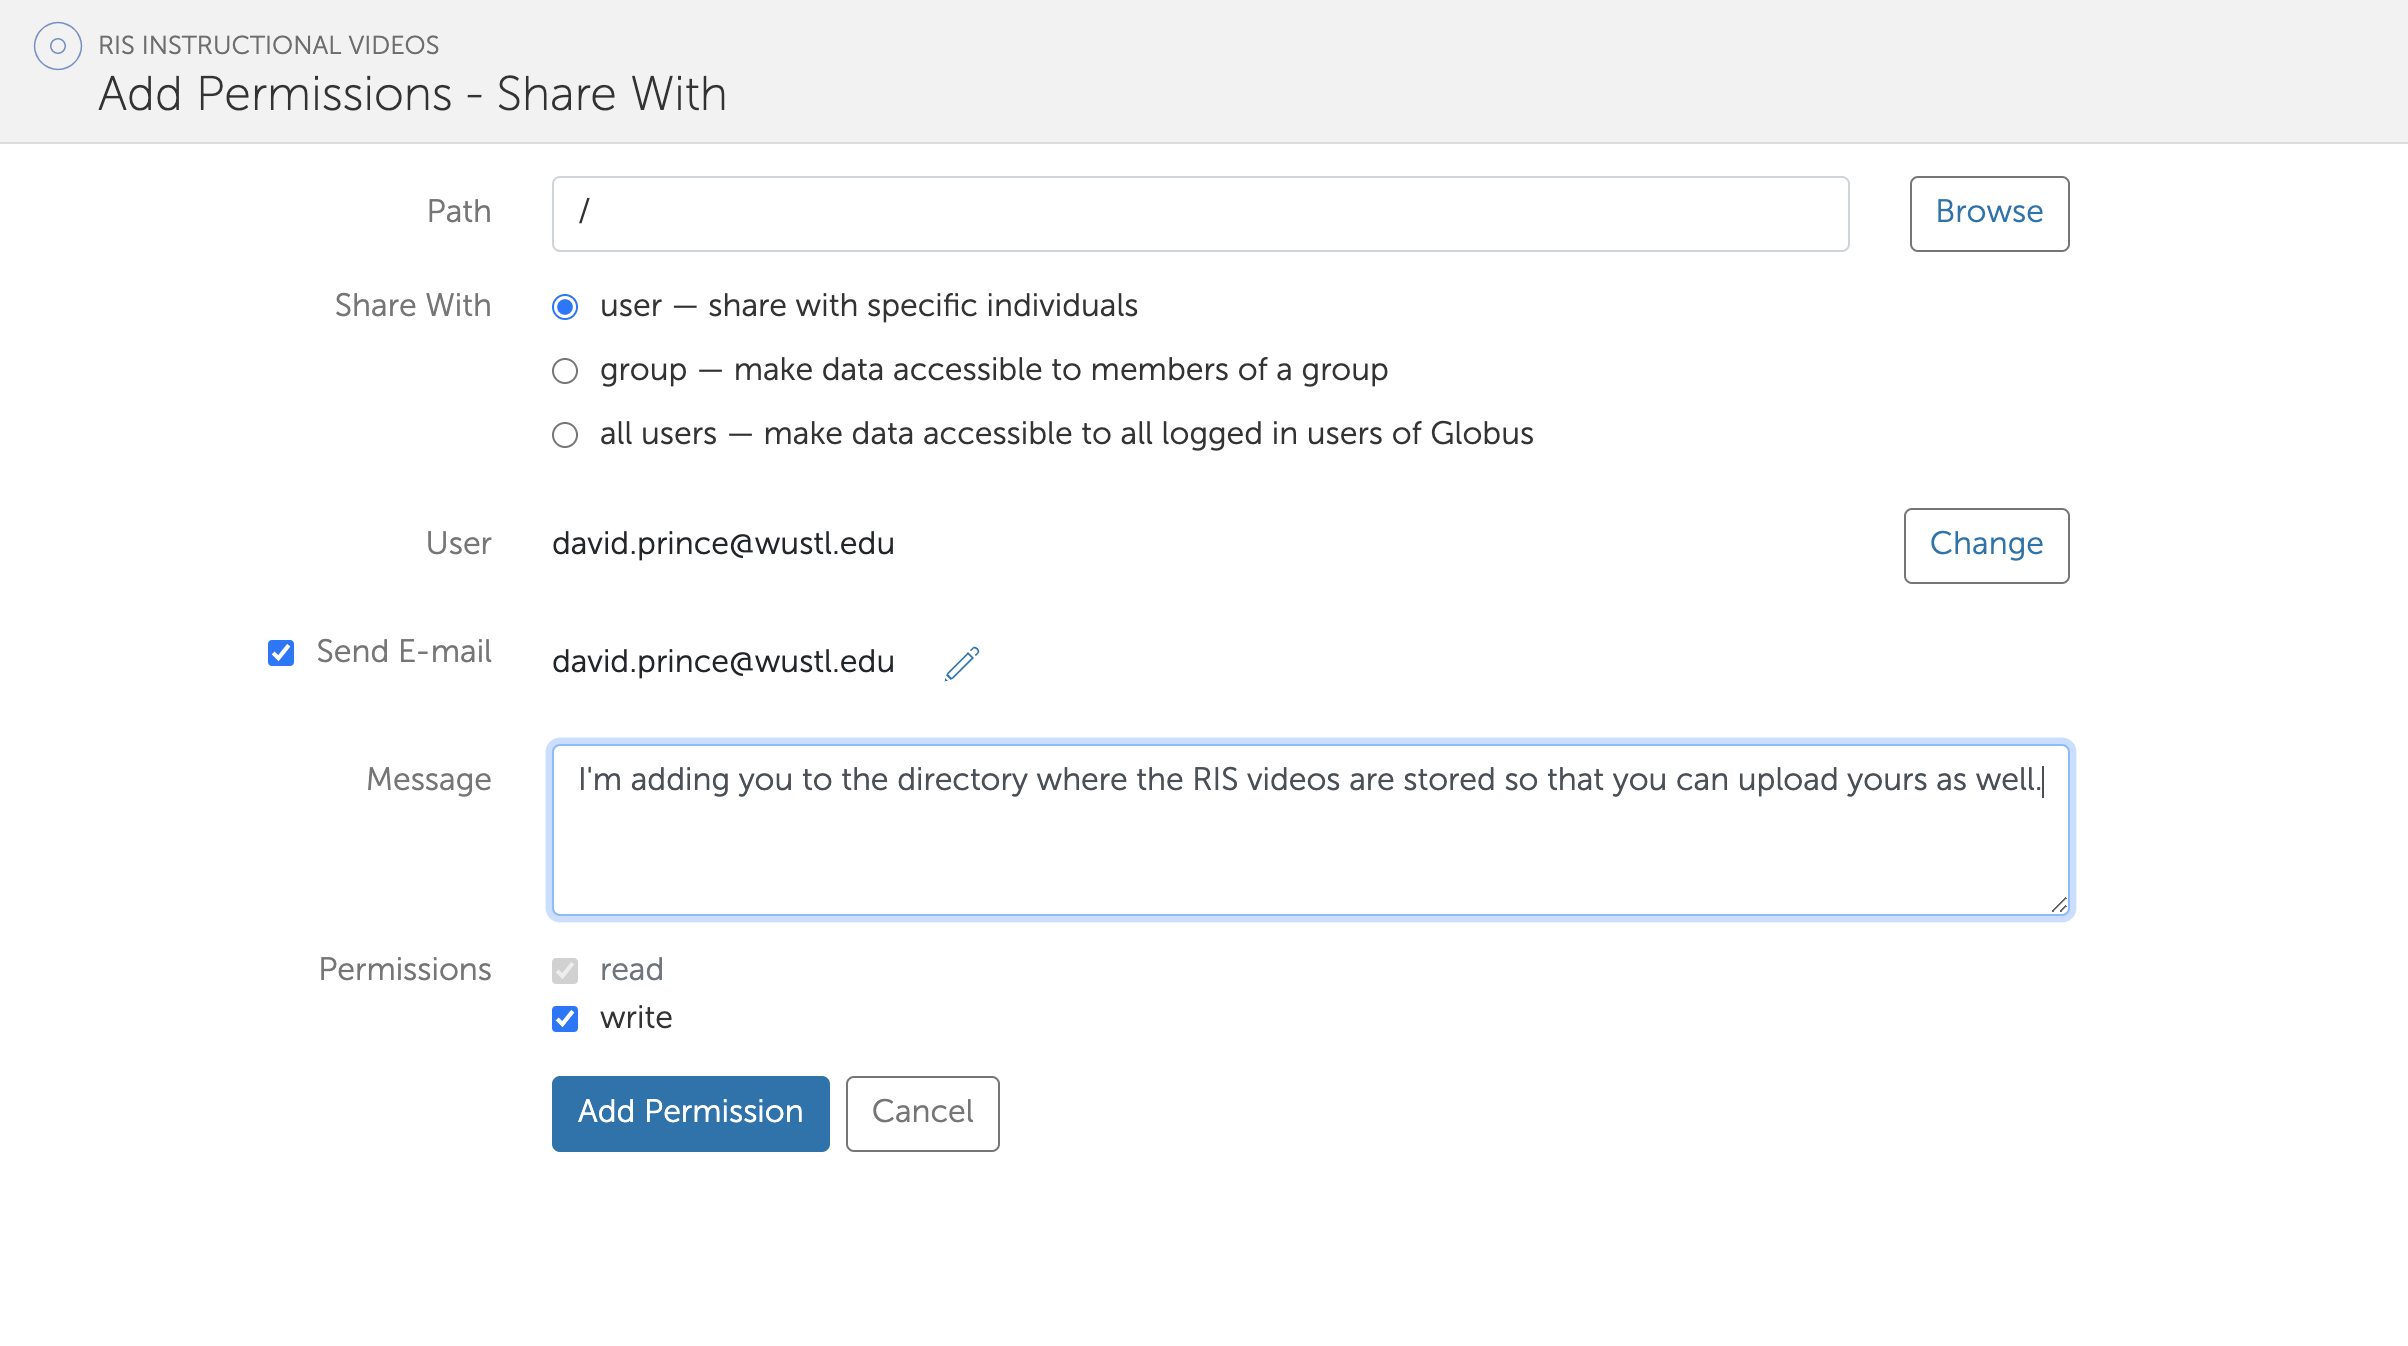
The example above grants read and write access to Globus user david.prince@wustl.edu.
The users you share with will receive an email notification containing a link to the shared endpoint. You may add a customized message to this email. If you don’t want to send a notification, uncheck the Send E-mail checkbox.
Warning
Granting write access to a folder allows users to modify and delete files and folders within the folder.
You can add permissions to subfolders by entering a path in the Path field.
After receiving the email notification, your colleague can click on the link to log into Globus and access the guest collection. In the example below, user grohder1@globusid.org accesses the guest collection. Note that the collection name is Demo and the path is /, because this is what the user was given access to.
RIS Managed Endpoints
Click on any of these endpoint links to open them in the Globus Web App file manager.
Research Storage
Legacy
Personal Endpoints
Follow Globus’ instructions for running a “personal endpoint” on your own local machine in order to transfer between it and other endpoints.
https://docs.globus.org/how-to/globus-connect-personal-windows/
https://docs.globus.org/how-to/globus-connect-personal-linux/
Check out our documentation on Globus Connect Personal here.
Current Limitations
Globus will not log or report deleted filenames when the “delete files on destination that do not exist on source” transfer option is selected.
In the event of a failed transfer task, Globus will not log or report the names of any partially transferred files. Files should only be considered successfully transferred if the transfer task succeeds or the files appear in the list of successfully transferred files.
Names of files successfully transferred by a task are only retrievable with the CLI or SDK, not the web UI. See Viewing Transfer Task Status for more information.
Task information is only retained by Globus for 90 days. This is not controlled by RIS.