Compute Quick Start
Compute Resources
Have questions or need help with compute, including activation or issues? Follow this link.
storageN
The use of
storageNwithin these documents indicates that any storage platform can be used.- Current available storage platforms:
storage1
storage2
Connecting via SSH
If you are off campus, you will need to use a VPN to access compute1.
Instructions for accessing the WashU VPNs can be found here: https://it.wustl.edu/items/connect/
If you run into issues using the VPN, you will need to follow the directions in the previous link to contact WashU IT proper.
Note
- WashU has several VPNs. compute1 can be accessed from the following VPNs:
msvpn.wusm.wustl.edu
danforthvpn.wustl.edu
If you are not familiar with a command line interface or would prefer a GUI, you only need to connect via SSH once.
You can use SSH to connect to the compute platform with your WUSTL Key (single sign on) and password.
E.g.
ssh wustlkey@compute1-client-1.ris.wustl.edu
Connecting to Open On Demand (OOD)
OOD is a web browser based interface that connects to compute resources, in this case, the RIS Compute Platform.
If you have logged in via SSH at least once, you can point your browser to http://ood.ris.wustl.edu .
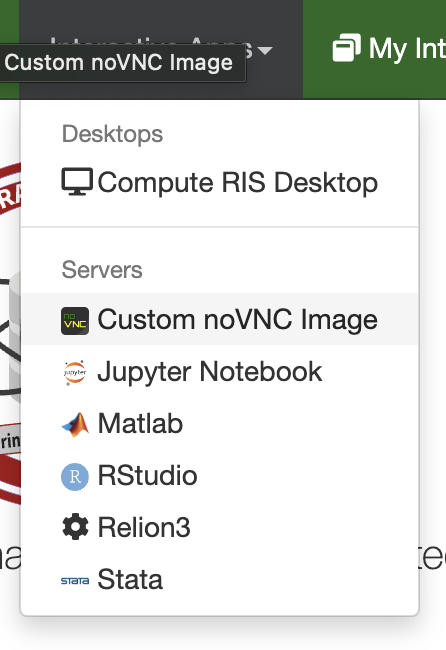
- Once you’re logged into OOD you can:
Start up one of the applications installed (Jupyter, Matlab, Rstudio, Relion3,Stata)
Use one of the RIS noVNC created Docker images (found here) via the Custom noVNC Image application.
Start up the Compute RIS Desktop to use a more traditional HPC environment via the module load system. You can find more on the THPC here.
Starting Up an Application in OOD
All of the applications, including the Compute RIS Desktop and Custome noVNC image, have the same base fields.
- The base fields are as follows:
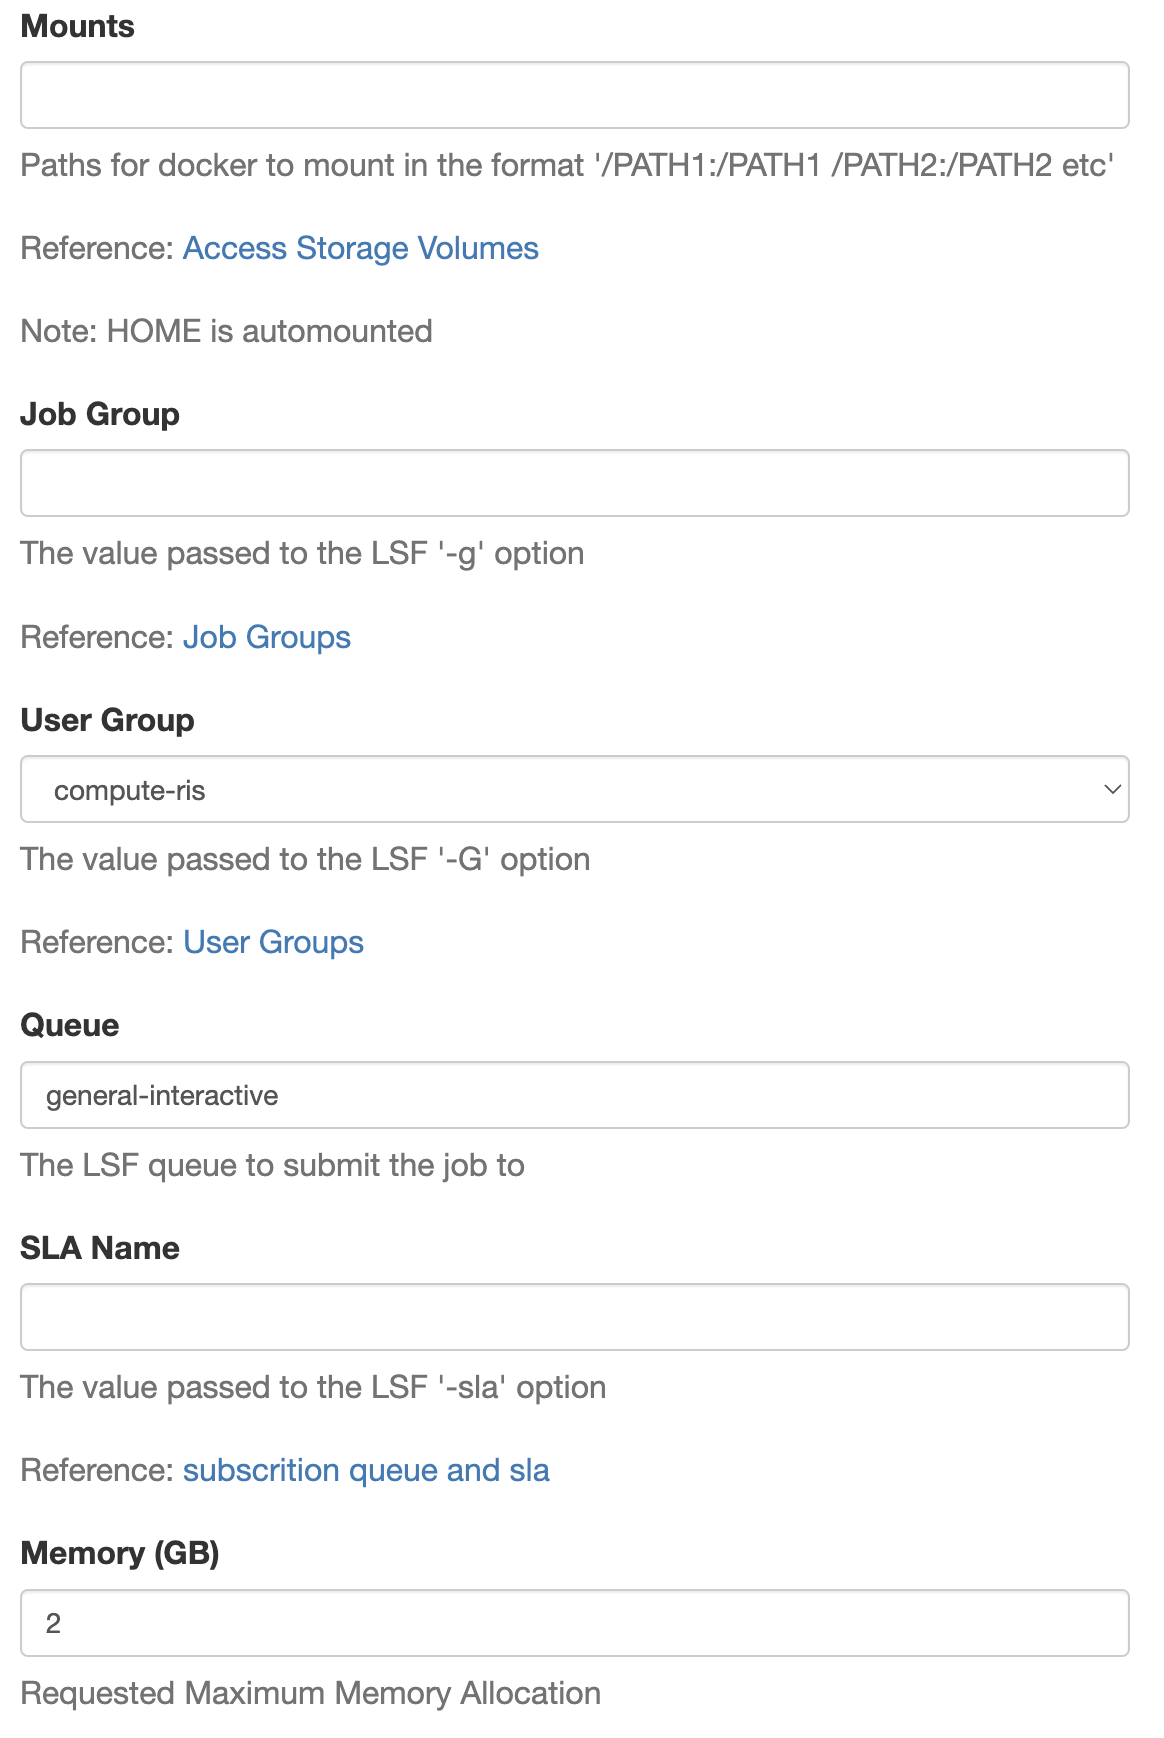
- Mounts
This is where you input your storage allocation information.
The format for this is based of the linux format and looks like: /storageN/fs1/${STORAGE_ALLOCATION}/Active:/storageN/fs1/{$STORAGE_ALLOCATION}/Active
${STORAGE_ALLOCATION should be replaced with the name of your storage allocation.
The name before the colon is the full path of your storage allocation.
The name after the colon is what you would like the path to be named in the application. (We recommend leaving it the same.)
More information on storage allocation can be found here.
- Job Group
The default Job Group should be something like wustlkey/ood
This field should be automatically filled in and does not need to be changed.
If you wish to know more about job groups, you can find the information here.
- User Group
This is a drop down menu of the compute groups a user is part of.
This does not need to be changed if the user is a member of a single group.
- Queue
This is a field where the user can input which queue they would like to use.
Only queues that the user is part of are valid. If you are not part of a queue, you job will error.
All restrictions on a queue are still in effect, even if the job is launched through OOD.
- SLA Name
This field is for users who are part of a subscription tier and can be ignored by general and condo users.
More information about subscriptions and SLA can be found here.
- Memory (GB)
This is the amount of memory or RAM you want to give the job.
This is constrained by the selected queue and the amount of physical memory available on hosts in that queue.
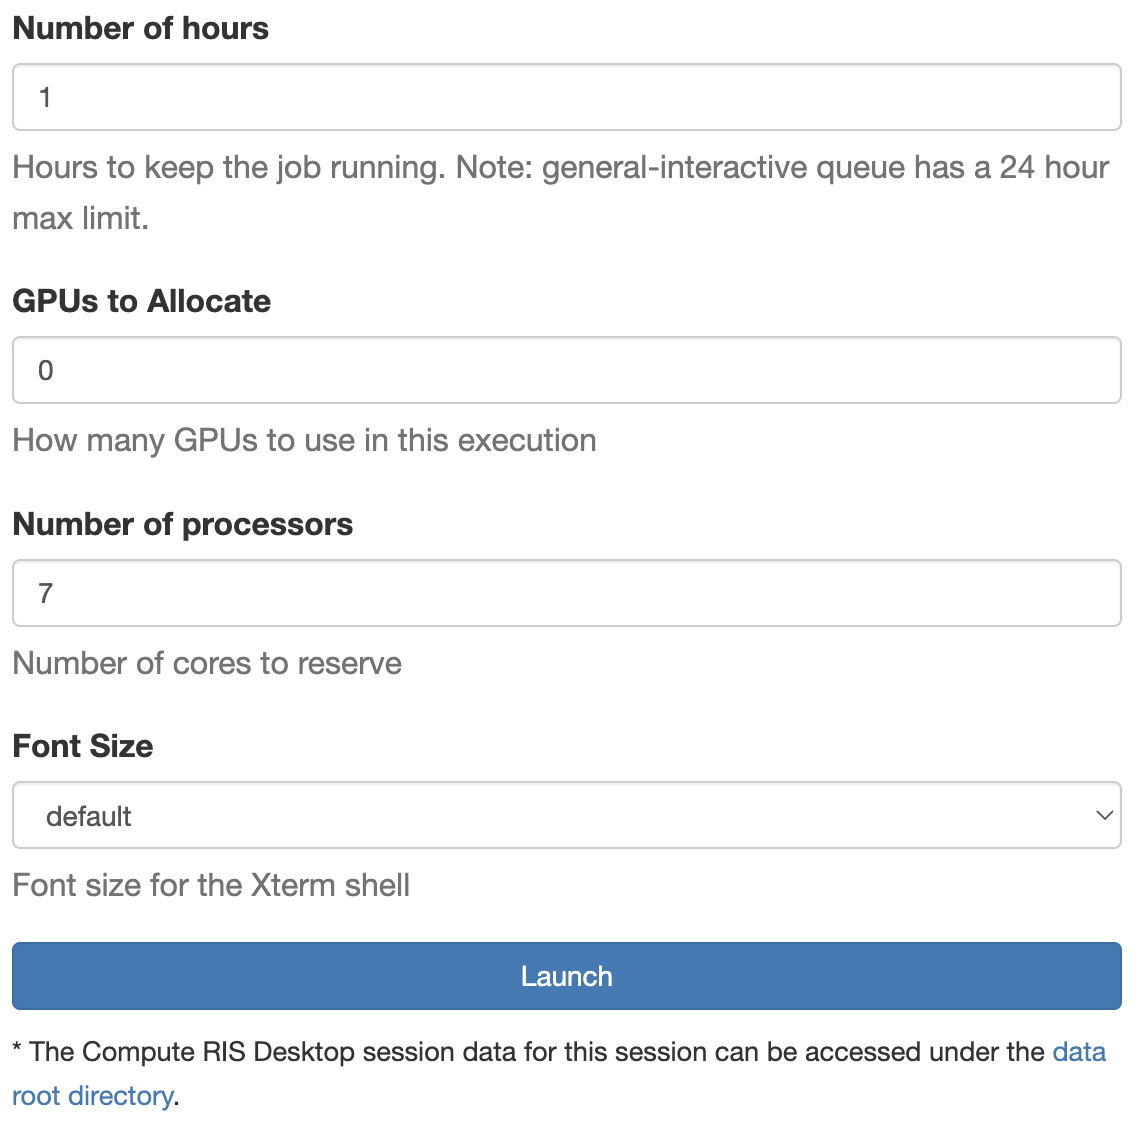
- Number of hours
This is the number of hours you want your job to run.
- This is limited by the queue chosen.
general queue limit is 28 days or 672 hours
general-interactive queue limit is 24 hours
- GPUs to Allocate
This is the number of GPUs you wish to have available for your job.
This is limited by the number of GPUs available to GPU hosts in the chosen queue (typically 4).
You can find more information about GPUs here.
- Number of processors
This is the number of processors or CPUS you wish to have available for you job.
This is limited by the number of CPUs available to hosts in the chosen queue (varies).
You can find more information about CPUs here.
- Font Size
This is a drop down menue that you can use to select how big you want the font in your job.
Some applications have fields that are specific to them. They will have a description of what’s required for that field.
Once you have filled in the appropriate fields, you click on the launch button and your job will be launched.
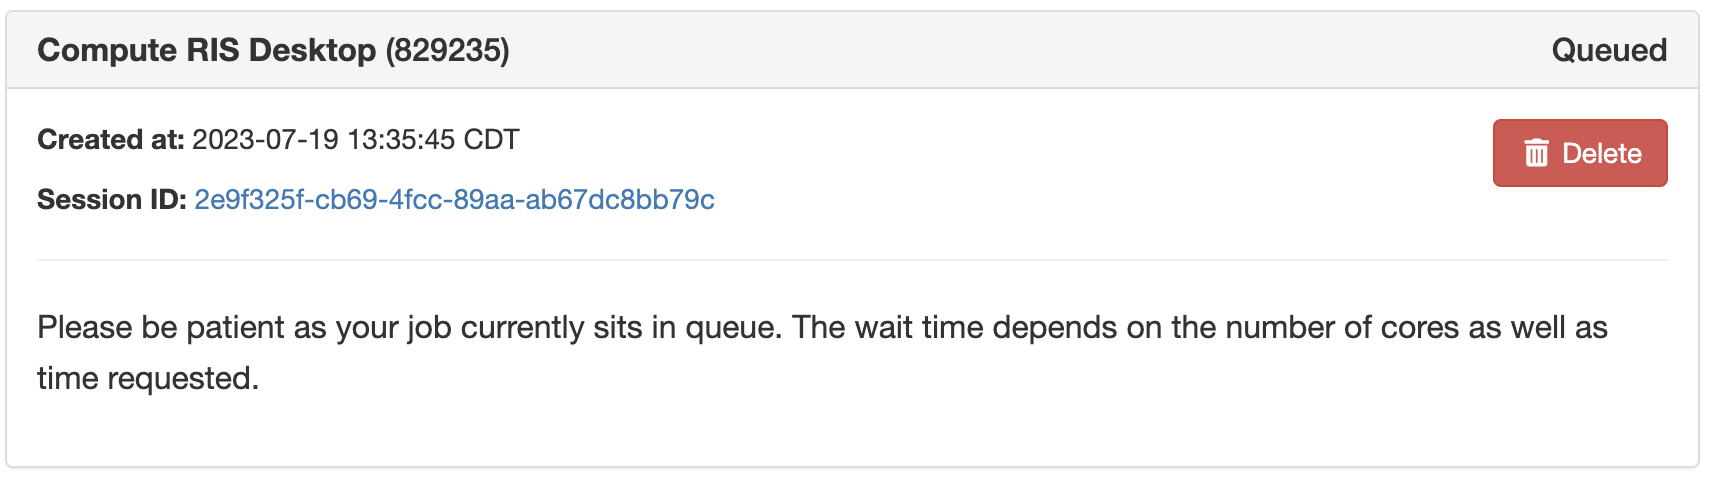
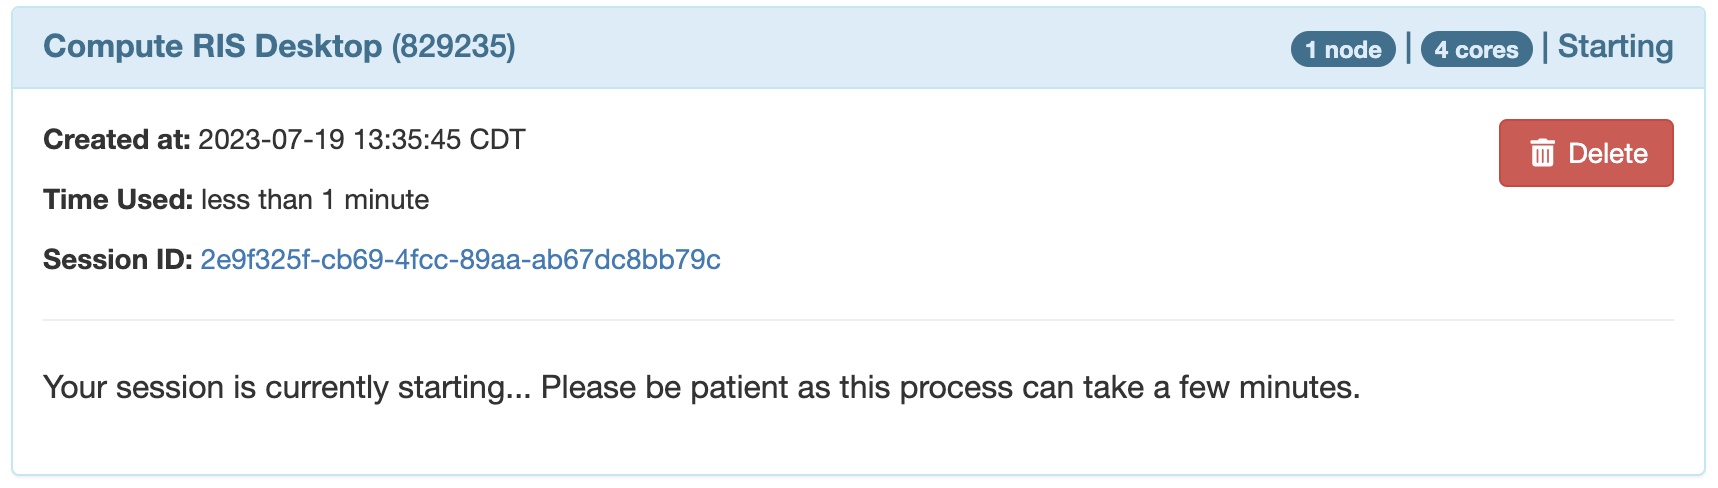
Navigating Your Job
Once your job is launched you will be taken to the My Interactive Sessions part of OOD.
Here you can see all of the sessions you have running.
- There are 3 states to a job.
Queued
Starting
Running
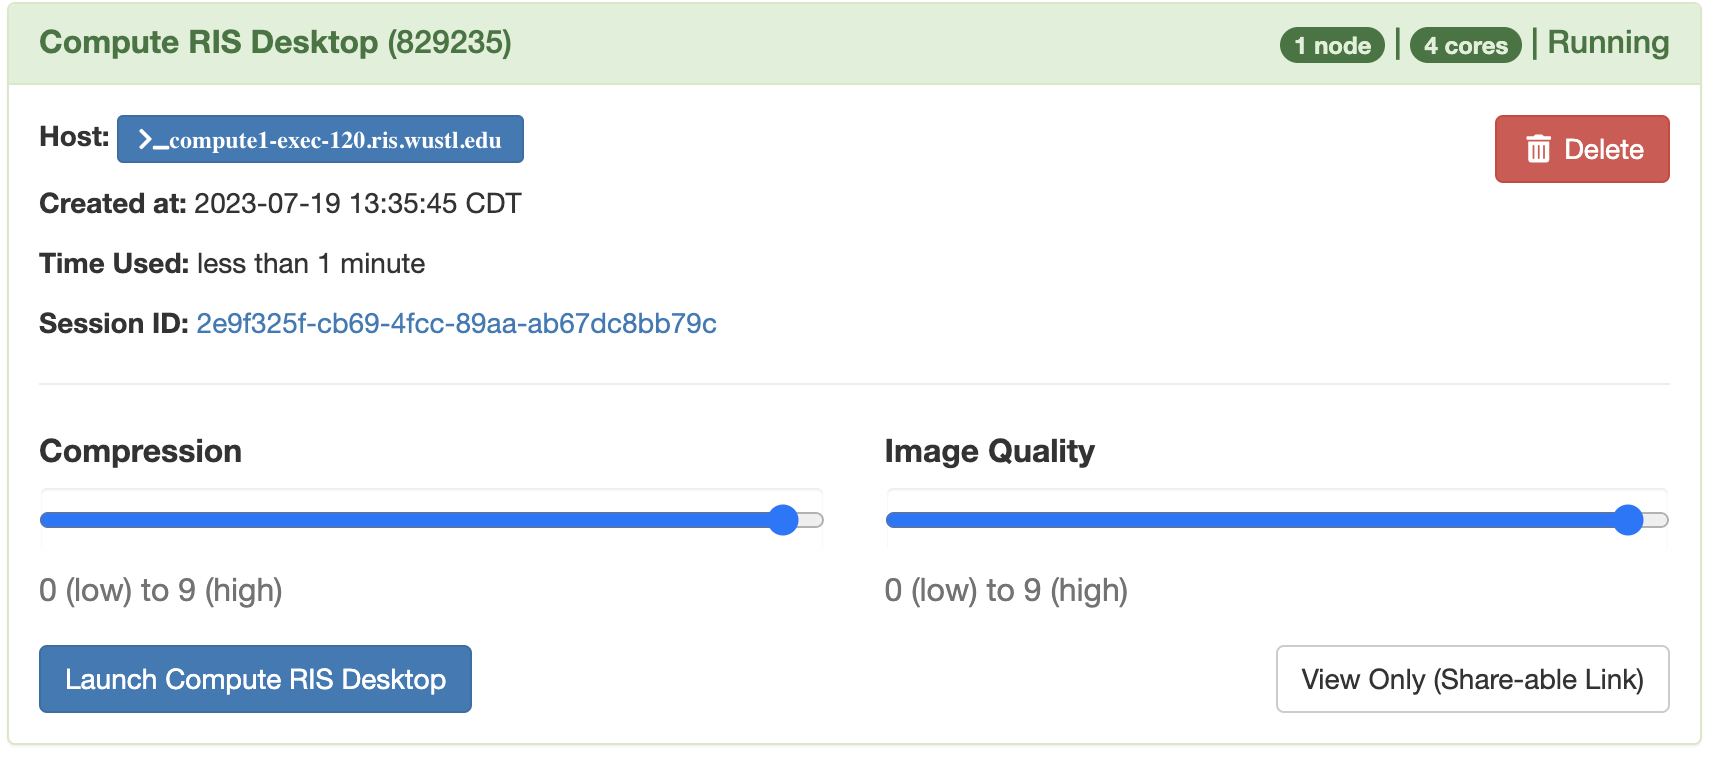
Once a job is in the Running state, you will have a launch button available. Clicking this will launch you into your chosen application.
The interface you see will be different based on the application you use, though most will launch you into a linux desktop.
If you wish to know more about OOD, you can find further documentation here.
Using the Compute RIS Desktop to Access the THPC Environment
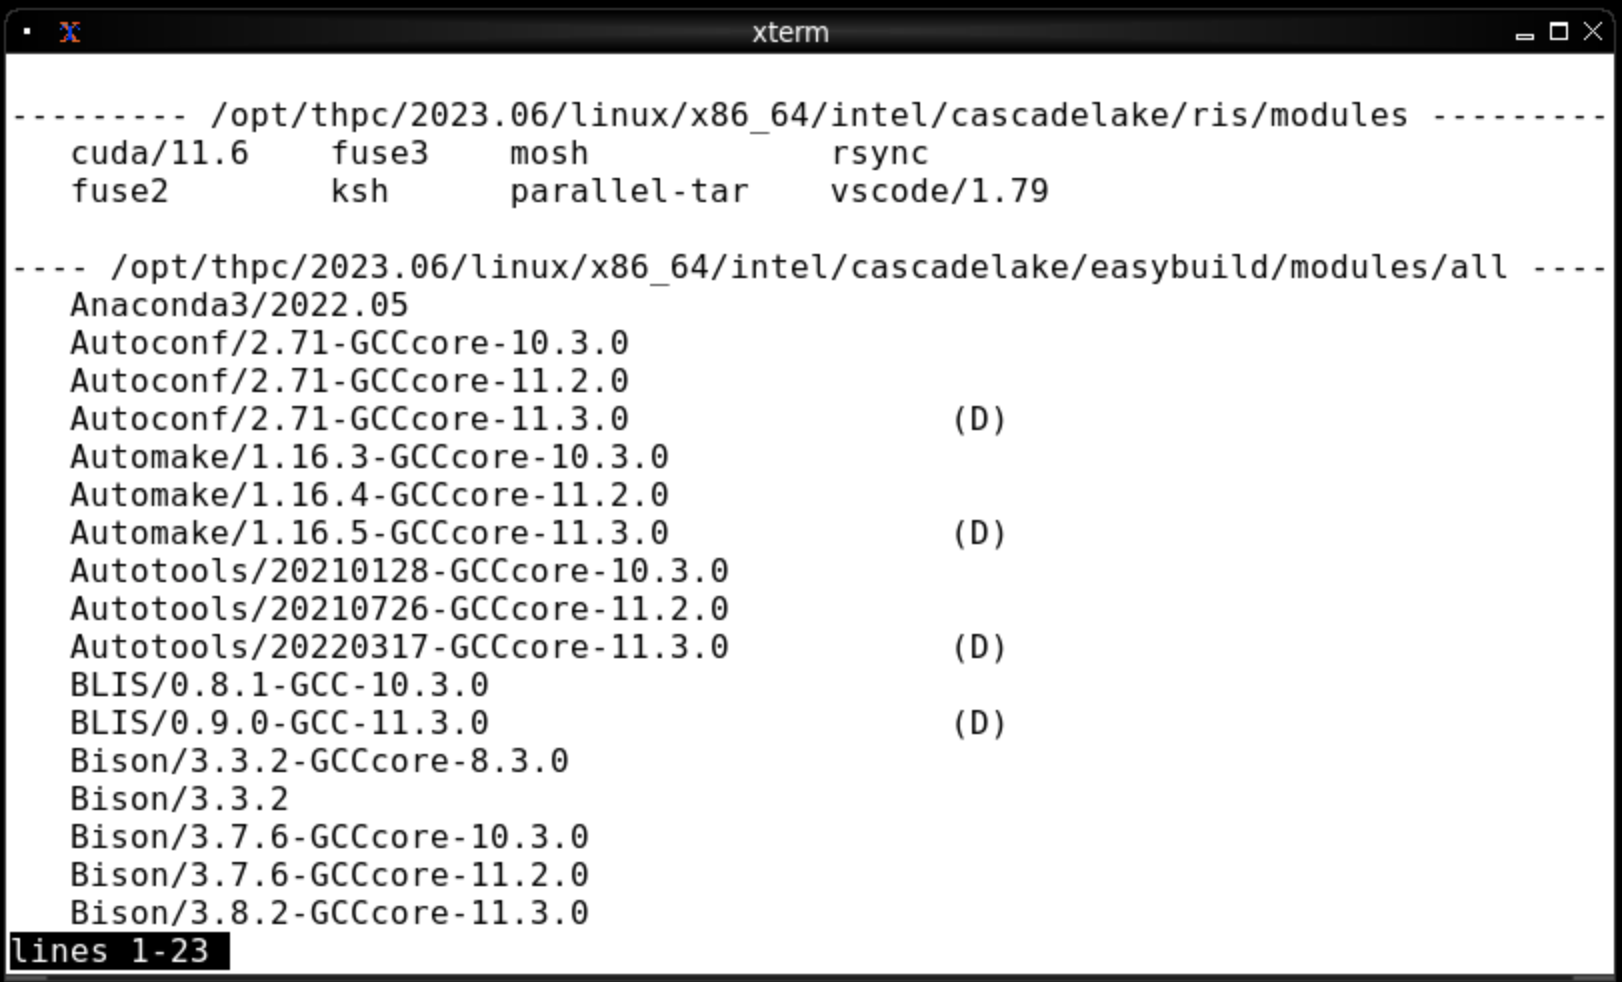
The THPC environment uses Lmod to dynamically control the environment through use of module files.
Here are the official docs for guidance beyond these basic commands.
Shorthand exists for these module commands as well. Use ml -h in a job session.
Loading modules without specifying a version will result in the default module being loaded.
Default module versions are denoted with (D) in the listing if more than one version is available.
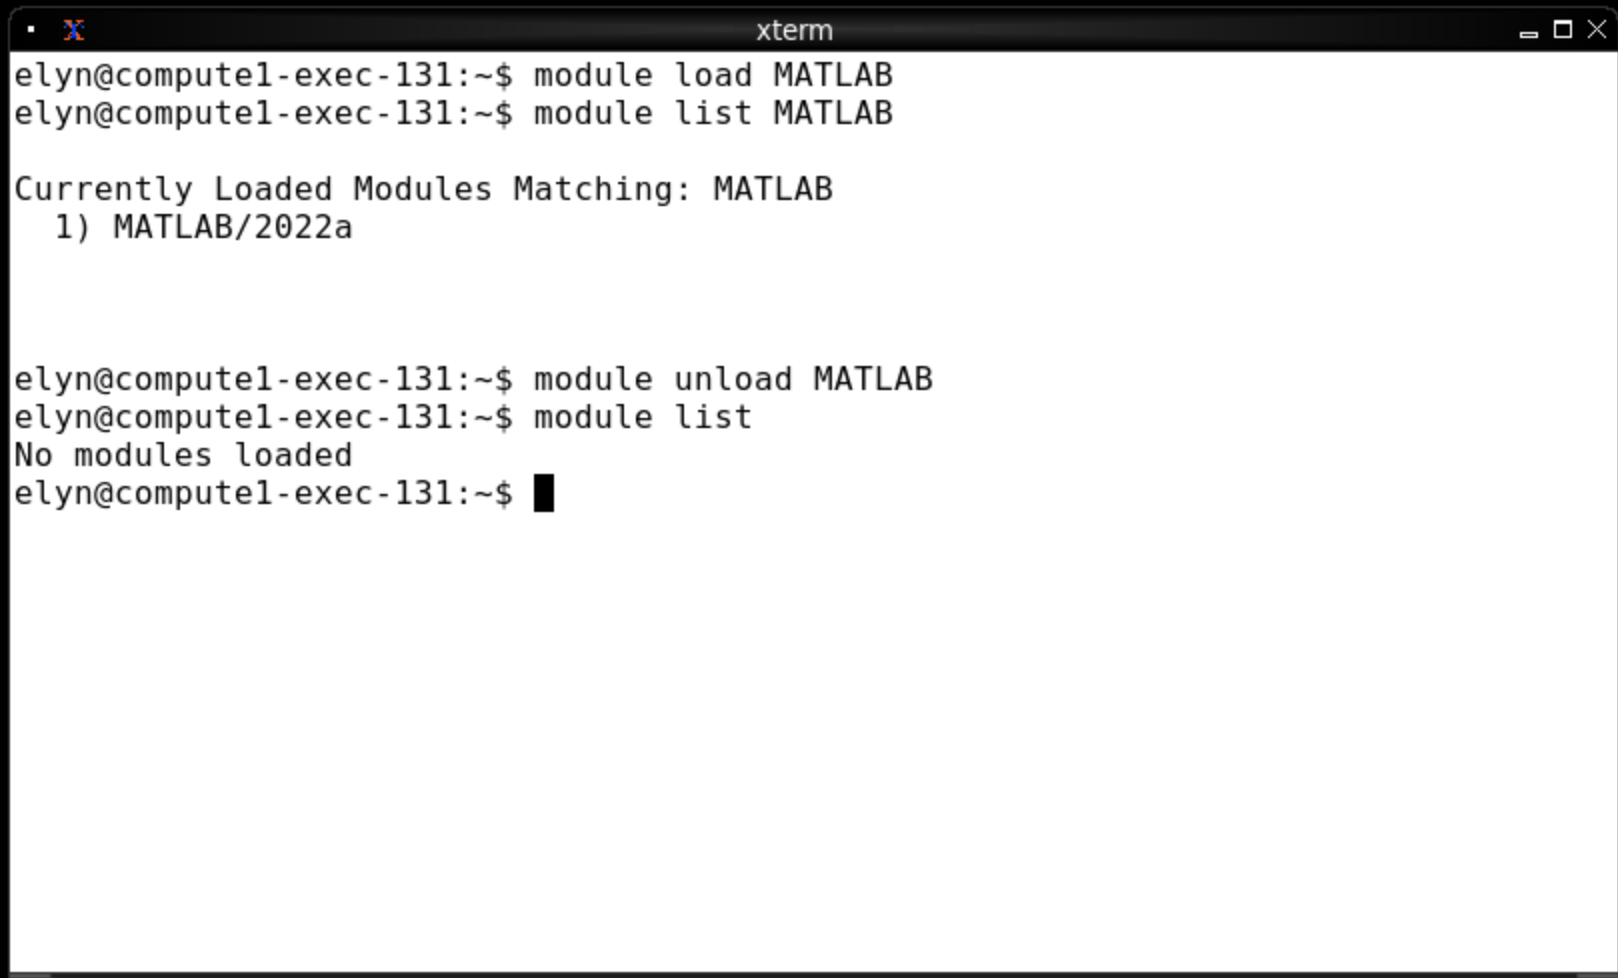
To view what modules are available you use module avail via the terminal.
To list what modules are currently loaded you use module list.
To load a module you use module load package where package is the name of the module.
To unload a module you use module unload package.
Using the Custom noVNC Image to Load Additional or Personalized Software
This application does not have a preset Docker image, the user supplies one.
The list for software developed to be used this way, can be found here.
If you create a Docker image using these images as a base, you can use that container here as well.
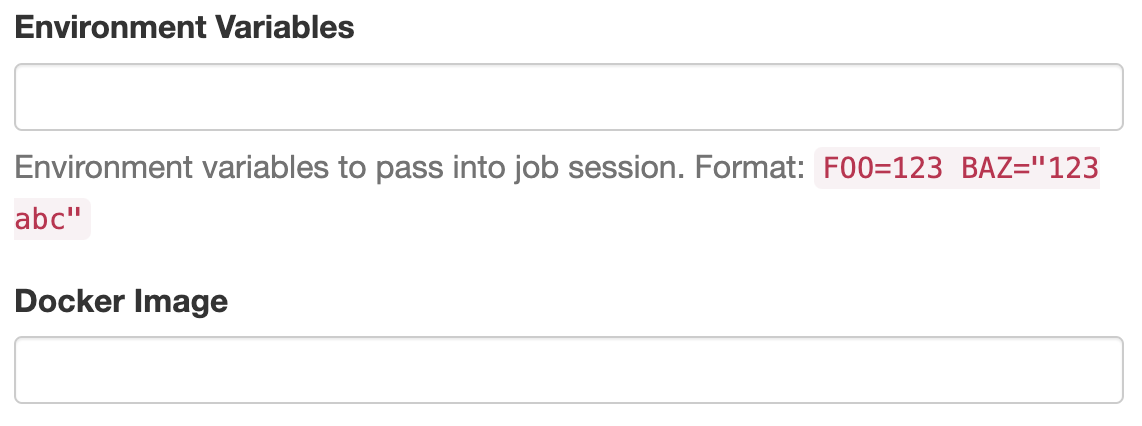
- There are two additional fields in this application that are important.
- Environment Variables
This is where you put environment variables that the image needs to run.
- E.g.
PASSWORD=password
PATH=/opt/conda/bin/:$PATH
Necessary variables for an image are included in their individual documentation pages.
- Docker Image
This is where you put in the name of the Docker image you wish to use, including any tags.
- E.g.
gcr.io/ris-registry-shared/matlab
ghcr.io/washu-it-ris/rstudio:4.3.0
Connect Using Local VNC Viewer
Further Information about the Compute Platform
- If you wish to know more about using the Compute Platform and the command line interface: